Introduction
This is a walkthrough of the map Cranium by Billy Boy for Duke3D. Take note that this walkthrough is meant as a guide to proceed further into the map at hand rather than mentioning the basics such as enemy or item locations. Also try to keep this as a reference and attempt to complete the map yourself.
Walkthrough
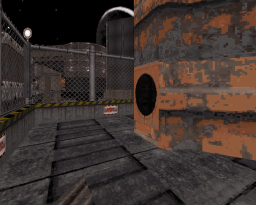
You start in a flashing vent area, so continue down and press the switch on the wall to crush the pigcop and hop down. Hit the switch just underneath where it was to start the trash compactor. Wait for that large explosive barrel to knock out the wall and proceed through it. Go towards the room with the pigcop in there and kill all three of them. The best tactic is to kick them from the edge of the door frame and make sure only half of them are visable to not get shot. Inside take the red key and press the switch. Go out of the room and press the switch to the right to open the door. Follow this conveyer belt outside.
 Once you’re outside, notice a lift ahead of you. Ignore this for now and take the left bend and go through the circular hole in the wall and take the lift down by pressing the switch. Press the next one to power up the room opposite and you’ll venture back up. Head back to the previous lift. Press the switch for it to come down. Take the top most part first and head up, enter the managers office and press the switch behind the desk. Go back down. Take the bottom part up and into the next room.
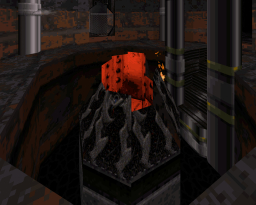
Use the red key you found earlier here then go underwater, near where the stairs are to get out of from the surface. Hit the two switches and take the blue card. Enter the room infront of the small stairs and use the card reader here. A wall behind the desk opens up with a mirror, go inside this to open yet another wall behind you. The code for those switches is on the door window. This moves a computer down with one last switch that needs to be shot. After the explosion sequence, take the middle tube down where you see a red palette.
 Resurface to take the ammo and needed pipebomb. Go underwater again and find the opening to resurface back into the same room again. Exit the area via the right with the blown up door and balcony. To the right is a door with a crack in it, use the pipebomb here. Shoot the switch on the opposite side of this door. Head back down the red tube and continue to submerge. Once at the bottom find the new accessable tunnel and follow it towards the end. Hit the switch, turn 180 degrees and a new compartment opens. Enter here and resurface. Take the boots and pipebombs and go back down. To you right should be a large pipe with a crack in it, you know the drill. Surface above the pipe.
Once you surface, use the switch under the computer then submerge back underwater while looking at the computer. A new area is accessable but again blocked. From here, aim at the fan and shoot it to cause an explosion, step back while this opens the passage some more. Surface and head for the front platform, take this towards some operating machines, then head back. Look toward the platform again where a large pipe was and there should now be an overide switch. This causes and explosion to the doors where the machine was. Enter this area.
Continue through and hit the switch on the middle pillar near the cardboard box, then enter into the area it opens up. Follow this vent through and take a right. You should see a phone. To the right of this is a switch. Check the monitor to see what it opens up. Head off to this area. The left most switch spawns an atomic health, while the other opens a shaft from the location you came from. Pressing this again spawns a battlelord, some ammo, other enemies and opens the door behind you. Make sure this switch is pointing down though when heading back. Enter this new shaft once you get there.
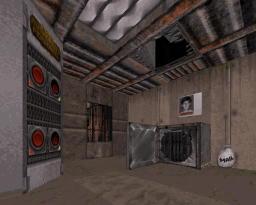
 You should now be on the other platform. Step on the side of the toxic pool and jump on the platform where the private property sign is located. Enter through the series of vents and drop down. Hit the switch and enter the door left of the yellow key required door. Once in here, hide in the corner next to the switch, hit it and enter here. Hit the switch on the large computer. Head out and jump into the toxic pool and up the pipe there. Surface and follow the passage up and take a right into a small office with a small safe. Hit the two right most switches to open the safe door, grab the blue key and shoot the ceiling vent. Climb through, keeping to the left carefully. Exit the vent and hit the 255 switch. Another pipe should blow open and you need to head inside it.
 Jump down, and head to the platform with a fence, then make a jump to the hole. Drop all the way down underwater and take the tunnel to the end. Take note of this gate 4. Head back and go to the centre most pool area. Where there is an image of a boss face should now be a switch, hit this which blows up the vent next to the pipe you fell down. Enter this area. Head inside the building with the yellow sign above and into the command centre. Take note of the Area 51 door. Inside this room hit the gate 4 switch, of which should be obvious where you must go. Head here and surface up. Take a left ignoring the switch here heading towards the boss face door. Jump up here then again to the left. Follow this corridor to the end.
Lizmen come out of a nearby door behind you so take the route and head in, use the blue key and hit the switch in this area. This opens up that door at the end of the corridor so head towards it.
Enter through this compartment and hit the Area 51 switch. Again it is obvious where you must go. These four rooms each have a switch that needs pressed to open the one at the end. The first left is behind the door, as well as the second left. The first right is hidden on the side of the desk near the mug. The last right door is hidden inside a wooden cupboard. Hit the switch next to the door as well and again hit the next switch when the platform lowers. Got through that door you unlocked and get to the end of the corridor. A vehicle with a battlelord will crash through some doors behind you so take him out and head in this location. Hit the switch here and head back to the command centre. The white cabinet doors should now be open with a lift ready to be used. Hit the wall switch to go down.
 Take a left into the bedroom and grab the yellow key behind the bed then locate a yellow keycard reader. Doesn’t matter which one as they all lead into the same area. This area will be refered as AREA10 to easily point back to it later. Grab pipebombs near crates and throw one near the crack left of the crates. The left most crate should be gone and in its place a hole. Check this and toss another bomb down. The right most vent should open up, so take this route. Continue through for a few goodies. This should have unlocked the ALPHA door so head there. It’s infront of the thin stairs near the cinema sign. In here, go past the piano and enter this area, hit the switch and head upstairs vai elevator near the front door. Up here take a right into the “quiet set” room and grab the red key. Head back and another door should have opened. The DELTA door is opposite. Quickly get over there by following the railing and use the red key here.
Instead, hit the switch ahead and drop down into the crane zone. Enter the crane from below and take the lift up. Head around the inside next to the windows and behind should be a button combination. Hit all except the top left one. This unlocks the lift a little to the left. Go up, kill the battlelord and hit the teleporter wall texture and head back outside. Enter the beat up babe land building and head under water in the small pool of water. Hit the switch down there, surface and take the lift upstairs. Hit the armory switch up here, jump out the window and take a sharp left to go behind the building. Climp the large pipe and get on the platform above with cliffside in view. Take a right until you see a small door with armory written above it. Enter this, take the lift up and find a small room in the left most corner. Hit the switch here and head back down.
The passage we came inside this building is actually another lift, take this down and head around the right to the toilet. Use it a few times, tap back and the wall should raise. The code are the two middle most buttons. This unlocks the yellow keypad for later use inbetween the armory and babeland buildings. Head to it, and look directly opposite. There should be a dark opening in the wall. We’ll need a blue keycard to get our yellow one. Head inside, find trashcans and break them to retreive one. Head back out and to AREA10. From the stairs facing ALPHA, there should be a small opening to the right with a lift inside. Take this down.
Use the blue keycard here and head inside. You’ll want to take the right most route from the pool towards the end. The button will change colour but just shoot it once and head back to the pool. It’s now drained with a yellow key in there. Grab it and head back to the yellow keycard reader. Once there use it and watch the decent little effect there. Once the building is destroyed, head to the front and down the exit vent.
KaiseR: Once you have destroyed the building with the crane and seen that it’s blocked below, you need to go back to the crane, and climb up to the last floor. There, a passage is opened which leads you inside the crane arm. Then by activating the switch, you spawn a level ending boss and open the passage towards the nukebutton below the destroyed building. Choose how you want to end the level.