Introduction
There’s something sinister lurking inside the UAC headquarters, so it’s time to grab your pistol, find a way onto the roof and then blast your way downward through 32 levels of absolute demonic congested chaos across varying themes and finally get to the bottom of this mystery. GOING DOWN was listed in the Annual Cacowards for 2014 at Doomworld.
Review

GOING DOWN has players do exactly as its title implies, beginning a long descent from the UAC Headquarters rooftop working their way through your everyday mundane office spaces and continuing downward until the very reaches of Hell itself. Every floor plays very much like a single set piece as if mouldy hand picked only the most memorable parts you would expect from a longer level and tailored them all with tightly focused layouts and a clear goal to achieve. There’s quite a selection of ideas at work here too, not all functioning as simple arena skirmishes but also including relatively normal ventures while others are built around a particular gimmick. Levels will consistently stick to a routine starting players inside an elevator compartment requiring a certain coloured key hidden somewhere on the current floor to exit and progress any further below. However this same routine will be broken occasionally to create unique narratives to certain floors based on how they begin.
There’s a large theme variation to be found inside the UAC Headquarters appearing over a steady pace as if following a self imposed story as we fall deeper into Hell. The main building itself remains focused on your standard themes taking place in normality for a dozen levels before heading beyond storage basements and sewage networks. Stranger, exotic locations are found further away from civilised territory where players will find themselves crashing a demonic sermon inside hellish temples; disturbing the eternal slumber of fallen beasts through dusty old crypts; rediscovering an ancient UFO buried deep underground; suffer the scorching heat from caverns brimming with lava; and exploring the digestive system belonging to a disgusting mass of flesh, to name only a few. Initial themes might seem boring in comparison to later ones, but mouldy ensures the opposite by using twists like time travel or including tough combat situations.
On that note GOING DOWN does not hold back any punches. Fights are brutal and can potentially be soul crushing at times. Mobility for starts becomes limited not only because of tight spaces, enemy counts tend to cause congestion. This in turn dissuades holding positions for too long running a risk in being swarmed, for example during MAP04 when the late Caco ambush nearly blocked my exit route. Map awareness while staying on the move are vital elements to survival, very much exploited during MAP27 where finding solid protection from enemy attacks is almost non-existent. mouldy understands how to pressure players, pushing them around where he wants them to be and creating discomfort by limiting our personal space or forcing us to prioritise key targets. The latter choice is frequently Archviles but I’ve had a fair share of terrible situations versus groups of Revenants or Cacodemons too. There was always a desire to rebel against this manipulated flow, having some success in MAP18 and MAP27 after finding advantageous positions. Most levels I don’t quite succeed and beckoned to return to these established rules.
Many times I have considered a handful of levels to linger right at the borderline of slaughtermap while another handful happily accept that very definition. MAP09, MAP13, MAP17, MAP18, MAP20, MAP24 and MAP28 all come to mind as the most chaotic scenarios I’ve had to survive, ignoring gimmick gameplay. Enemy infighting might not be required to beat these levels, doing so can be an invaluable resources in certain circumstances. Take MAP18 for example; I’m confined within a cramped cavern, a legion of Barons blocking many of its paths and defending my current position had negative effects on ammunition. To alleviate numbers despite lacking enough firepower on hand I purposely baited Cyberdemons to attack them which in turn allowed me to locate supplies. mouldy doesn’t exclusively commit to gigantic armies however. Even a meagre demon counts from MAP08, MAP21 and MAP23 still managed to create hostile encounters; MAP08 exploits its tight environment and blind spots; MAP21 limits your available weapon against small hordes; and MAP23 only throws squadrons at any given time opting not to congest.

In honestly my original playthrough started on UV before giving up around the second half of MAP13, finding its method of congested difficulty to be too frustration despite my efforts failing several attempts. I wanted to move on to see later levels dialling down to HMP. A second attempt at UV in preparation for this review was successful however and noticed that differences were quite slim. Selected Hellknights becoming Barons instead or effectiveness of powerups are reduced such as the blue armour in MAP16 being replaced with green. Monster density doesn’t change a great amount though. My initial thoughts on MAP13 remain intact which can be found much further below. Having played through every level twice from a pistol start, they’re all individually balanced around their starting weapon choices aiming for distinctive playstyles between maps. Players carrying over previously acquired weapons might miss out on these finer moments; MAP03’s claustrophobic chainsaw onslaught; MAP07’s close quarter Rocket Launcher fights; MAP15’s arena weapon progression; or MAP19’s BFG ammo management. Beaten. Deprived. Exhausted. Regardless how the journey fairs GD is thankfully not a broodingly serious affair. moudly gladly dabbles in good light hearted humour to relieve players from all that built up tension. Intermission screens are complete with a funky elevator style tune while Doom Marine patiently awaits his next stop. Not to mention his mother calling at key intervals to check up on things.
Rounding off this review I’d love to pay special attention to the original soundtrack since it helped exemplify tone on a map by map basis, except my lack of musical knowledge and understanding of proper terms might not do it any justice, so please bear with me. I full stop love the distinctive style. Each track simmers with a tongue-in-cheek glee yet still captures either a mysterious, unsettling or action orientated mood depending on levels they’ve been applied to. “Attack of the Spider-Clowns” (MAP19) was an incredible way to introduce a level as you descend into an alien spacecraft while a dozen plus Archviles sleep in stasis, yet there’s a childish self awareness about it all; “The Haunted Aquarium” (MAP05) takes on a rather cheerful mystique, while a similar sounding “Zombie Maggots In The Flesh Cathedral” (MAP21) becomes increasingly eerie because of deeper beats and a haunting organ melody; “Robo-Zombie Mecha-Brain Boss Battle” (MAP27) is resorted to high adrenaline levels using a fast pace and seemingly never ending loop when you’d assume a pause the track simply never lets up; “Wedding March For The Princess Of Death” (MAP28) is perhaps a more traditional track of sorts, a broodingly dark opera suitable for a chaotic finale. mouldy’s soundtrack contributed a lot to my enjoyment of GOING DOWN.
Conclusion
GOING DOWN is an excellent megawad and has become an all time favourite release. Themes, visuals and gameplay elements are diverse across all 32 maps making good use of default Doom assets (barring a few cases) and comes with a distinctive soundtrack. High enemy counts wasn’t the only driving factor that made combat difficult, but mouldy’s own understanding how to pressure players and manipulate them into unwanted situations, which comes across as a signature style in my eyes.
Download Mirrors
Individual Level Summaries
MAP01 – Going Up
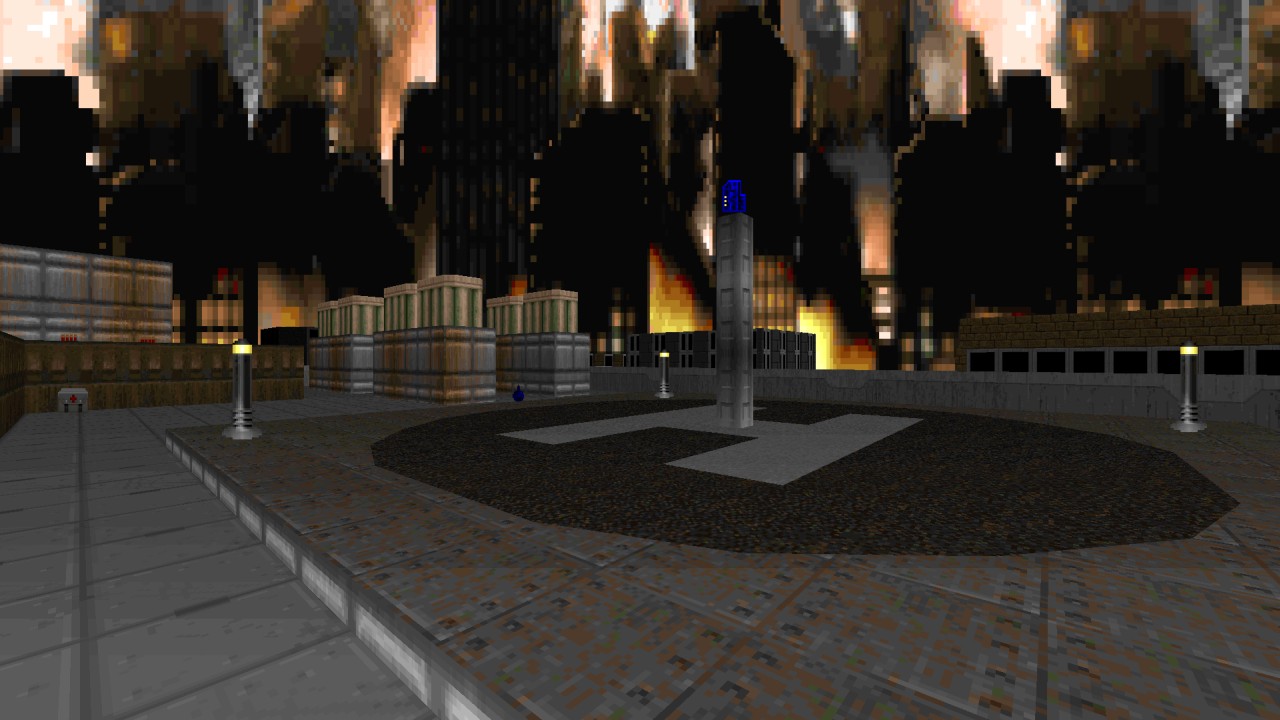
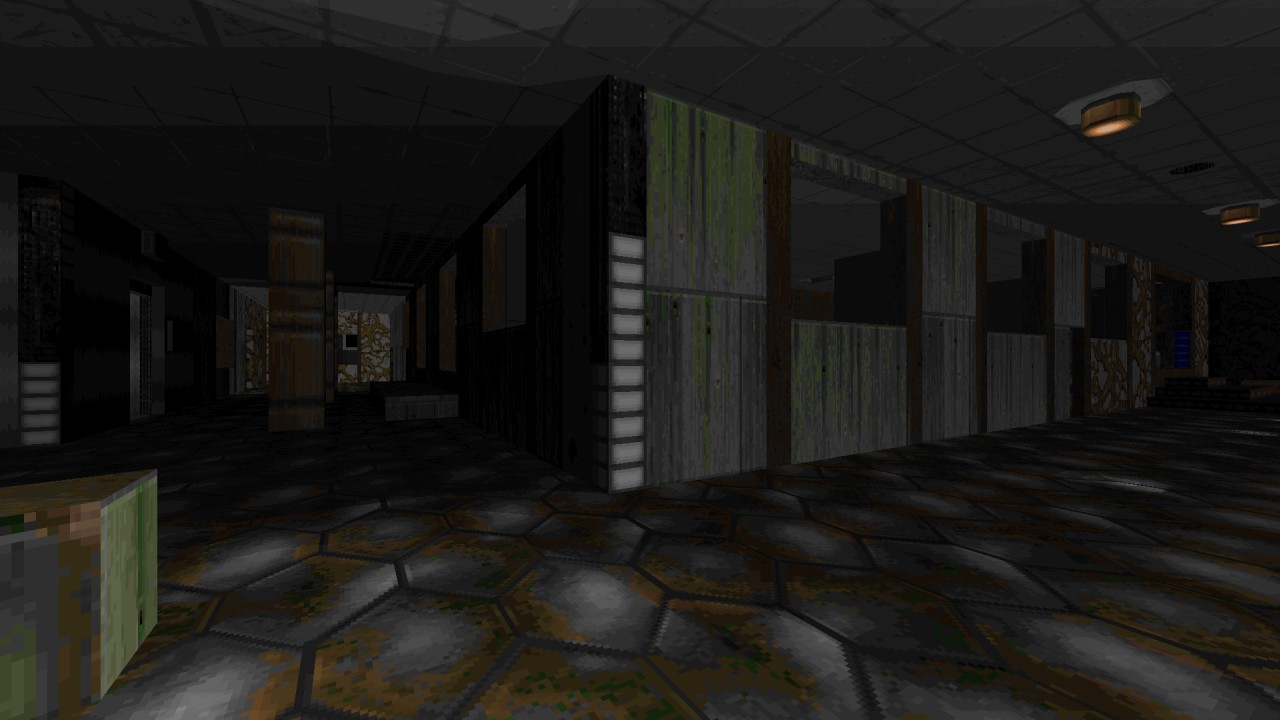
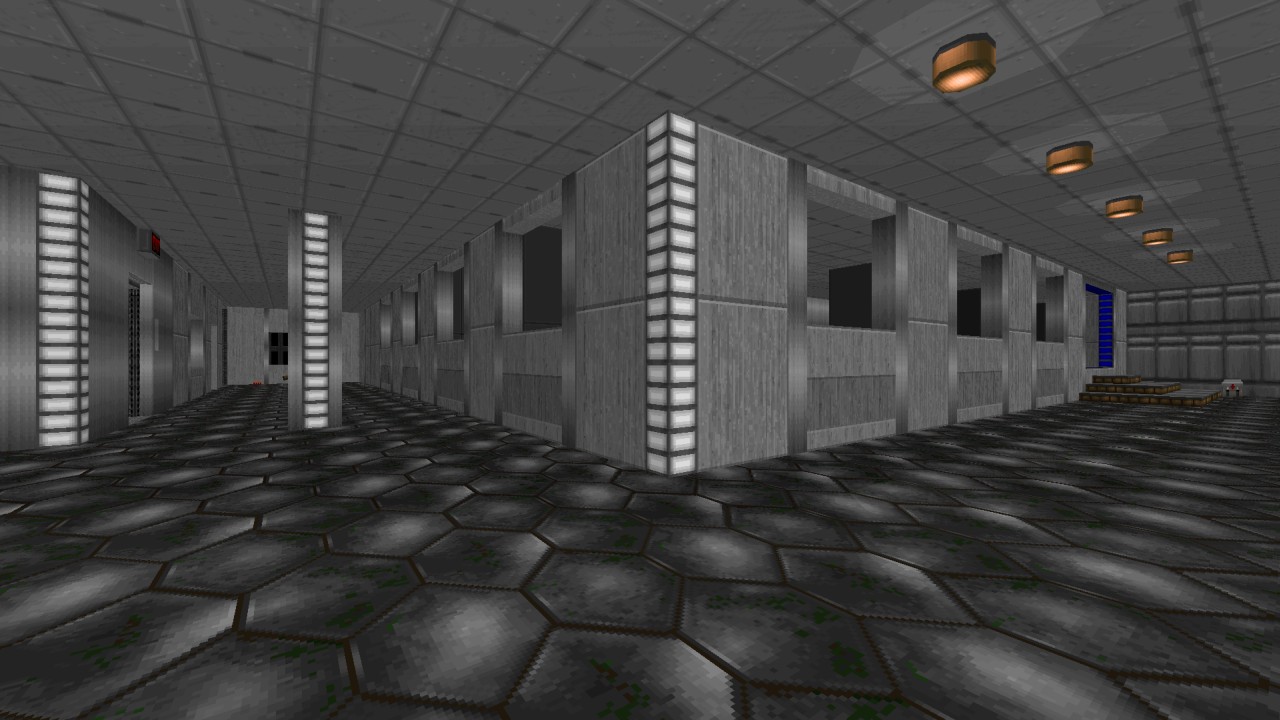
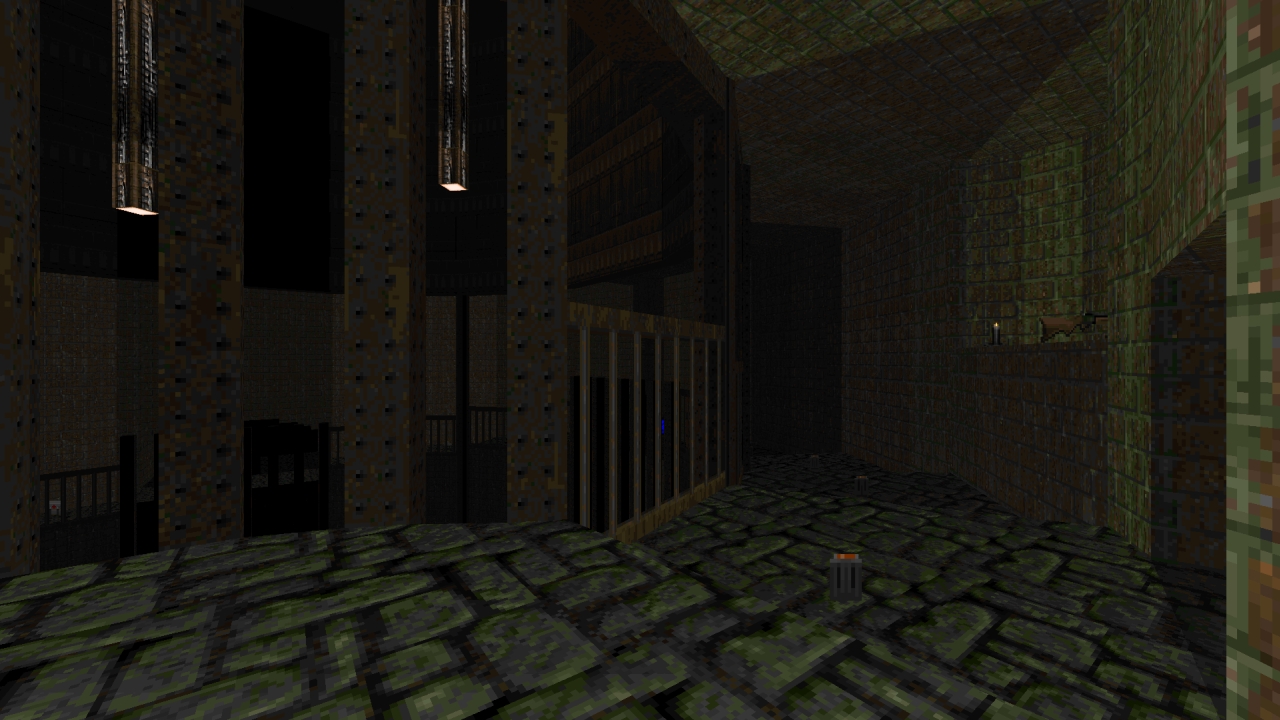
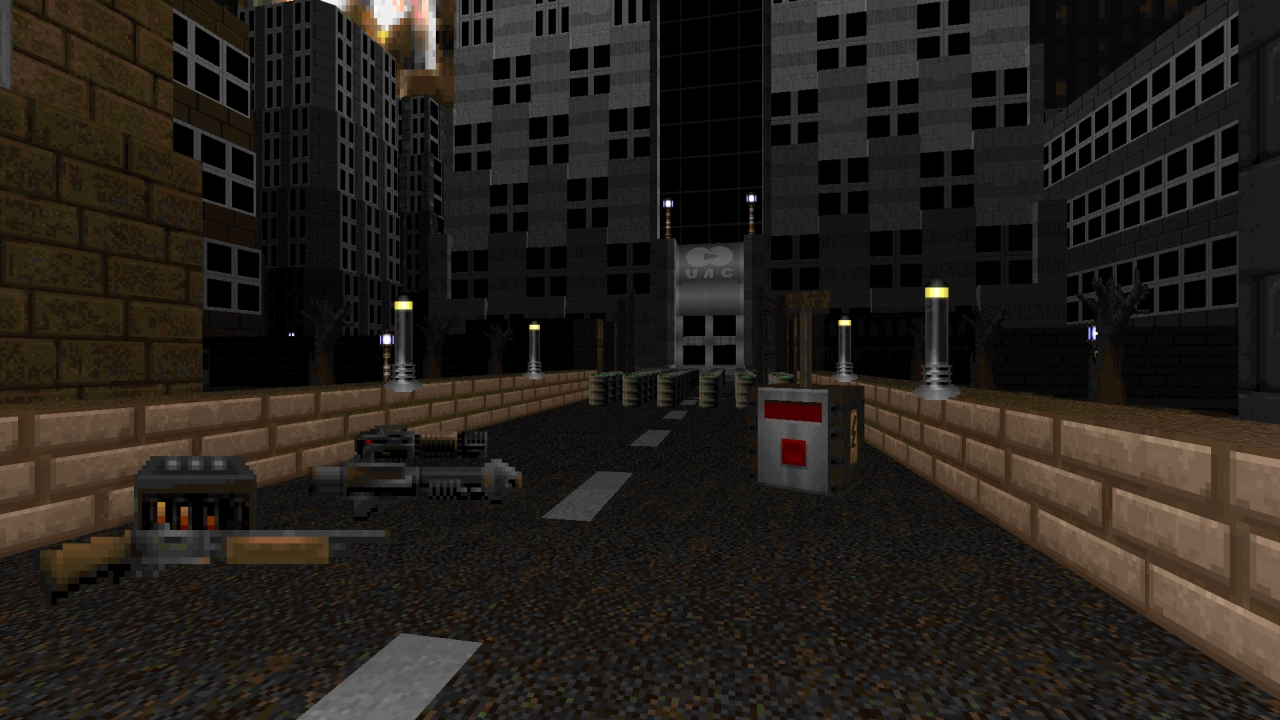
The UAC Headquarter’s front entrance is under heavy lockdown leaving the rooftop as our only means of access past a light guarded security booth. Either Doomguy is being underestimated or the demons are welcoming him with open arms to test his luck going forward. Zombiemen make up the bulk of resistance here scattered about to attack from all angles or waiting in ambush to tag those not paying attention. Cover from fire is always available making it a simple matter to avoid too much damage as they start pouring in dozens at a time, only changing positions to put distance between us. Their sheer numbers can potentially make this a hitscan nightmare so grabbing a shotgun early will do wonders to mow them down. Health is plentiful assuming mistakes aren’t made too often and grabbing the armour requires exposing yourself on a central ledge. MAP01 is a simplistic introductory level that warns players early on they should always remain prepared for similar congested battlegrounds in future since this becomes a reoccurring gameplay element. Get used to seeing that elevator interior too, a common sight on nearly every floor marking the beginning and ending point going forward.
MAP02 – Evil Admin
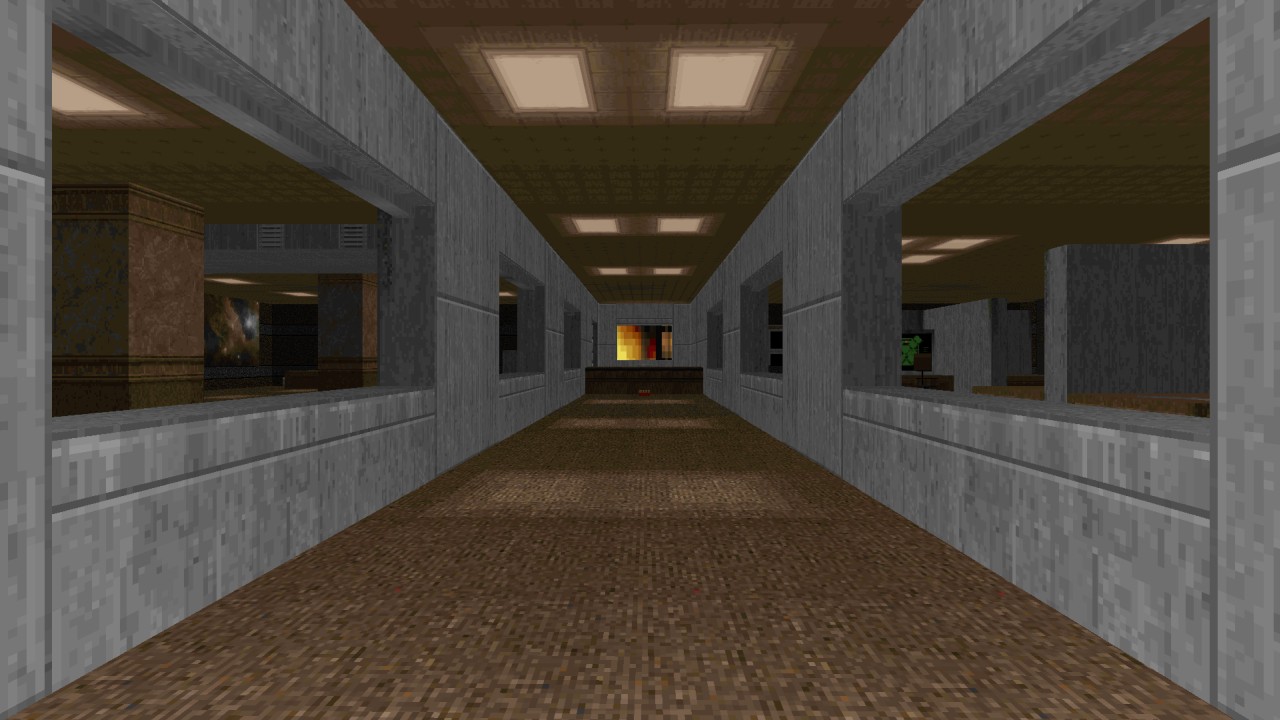
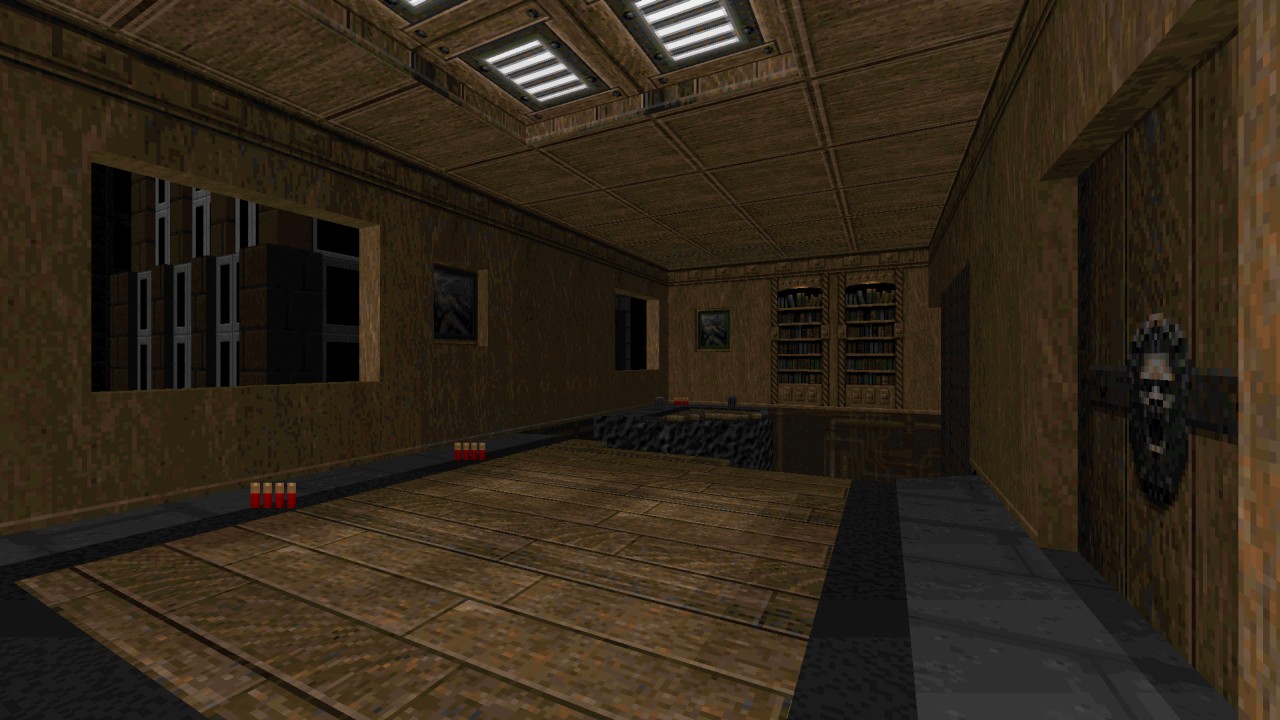
As with most buildings an office suite takes a role for one floor, a typical working space where the most mundane of tasks are dealt with while other UAC staff members on lower levels have more interesting routines. Who thought a demon invasion would spark so much needed life back into a working shift? MAP02 is a small level divided across a few rooms and forces many close quarter fights against numerous hitscan targets. All normal entry points are locked except for a ventilation shaft breaking past their defence. After dropping down to say hello I was immediately surrounded by Sergeants and fired upon from across the other room. Dealing with immediate threats is important here instead of wasting ammo on other targets who can be tackled later since supplies are low. Ammo management is key often forcing me to rely on monster drops when short. It’s too bad some drops on desks can be denied if enemies die in an awkward spot. The tight central corridor also made for a neat brawl against Imps as they trickled closer to my position, hurling fireballs while I was too occupied keeping an eye on Chaingundudes. Nice attention to detail using middle-textures to fake swivel chairs and cups with sector based paper tossed all over the floor.
MAP03 – Crawl Space
It wouldn’t be surprising if the ventilation shaft from MAP02 was the source of inspiration for this level which has players crawling through ducts and other tight passageways in between rooms as their primary means of travel. From pistol start, combat exclusively centres around chainsaw gameplay against Pinkie hordes charging down confined spaces. Small windows peeking into larger rooms are dotted along shafts inhabited by other brutes posing no real danger right now, but can be fun luring them over for a quick mincing to save any hassle later. Other weapons aren’t normally accessible unless a chaingun happens to drop within reachable range, but otherwise combat is dependant on a chainsaw for survival. Lighting alone creates a suitable atmosphere based around gameplay where light gradients seeping into these dark crevices from rooms not yet accessible to tease players that freedom is out there. Other nice visual touches include a trapped Baron and Mastermind raising questions whether these creatures are used for experimentation around here.
MAP04 – Blood and Rockets
Much like how MAP02 plays out this one too uses enemy congestion inside smaller spaces, pressuring players by utilising many weaker mobs while tougher brutes edge ever closer. Cacodemons were for certain nasty to deal with, sneaking through windows as their entry points at the worst possible moments. Keeping mobile can be considered an advantageous decision until a few Revenant rockets slip through the cracks suggesting the second common theme of GD; nowhere is truly safe. Congestion alone isn’t really the problem since Zombiemen and Imps were easy to mow down. It’s how mouldy pushes players into unwanted situations always aiming for discomfort at any given moment. That’s the role Cacos play here which made my stay inside any side room almost a death wish if I wasted too much time loitering. I eventually retreated to the central room around the blood fountain to tackle them, since I didn’t feel like my escape route being blocked despite a higher risk that my rockets explode too close.
MAP05 – Time Warp
What appears to be another standard affair hides another gimmick behind its back and a pretty neat one too, being based around travelling through time between our present day and a not so distant future. I’m loving the contrast across time periods. The present shows off a clean, pristine UAC lab environment using lots of white or silvers, donning its main room with many computer systems. The future however depicts a darker textured, disarrayed version of the very same floor where most sections have been destroyed. Perhaps this fate awaits us if we fail in this mission? Demon attacks are prevalent no matter the hour, only to intensify when crossing over to the other side. Had trouble maintaining my health since hitscan groups guard some nasty positions. Low hitpoints is especially troublesome when returning back through the teleporter to stare into an onslaught of bullets from freshly placed Chaingunners. Limited puzzle solving takes place here to gain access to a yellow keycard using new paths shaped by an apocalypse. Getting there does involve exploiting similarities between both timelines in your favour. Shame the level is so short, I wanted to see more elements like this further ahead and maybe a secret route to the past.
MAP06 – Painframe
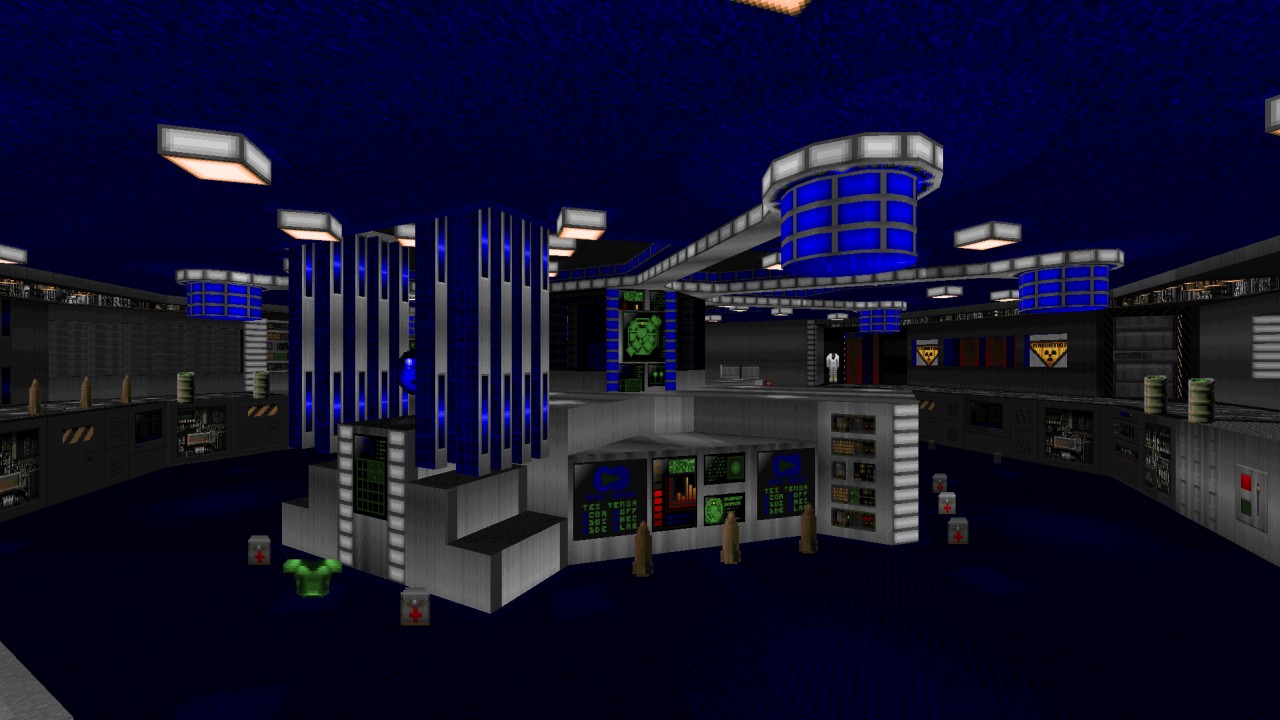
You’ve reached the UAC HQs mainframe computer where a lot of action takes place around the central system, also doubling as our major form of cover. Getting started will revolve around using a Blur Sphere to clear out the initial group but this place quickly fills up again during progression. Congestion as usual might pose danger except enemies are simple to manage. The circular looped room can be exploited to cause infighting and then tossing rockets into clusters for good measure. I had to take care not to be hit by stray projectiles of course considering ceiling space is quite open. Eventually I was warped into a cyberspace arena as if becoming an anti-virus clearing out unwanted data as they too warp in to join the frey. Surprisingly a fun battle circle strafing and wrecking havoc, probably due to earlier floors not easing out in a similar manner.
MAP07 – Bad Reception
By now it should be glaringly obvious mouldy enjoys putting players into difficult situations and right away that holds true. The only weapon teasing us to grab is a Rocket Launcher sitting downstairs guarded by a couple of Mancubi behind the front desk. Not too much hassle, right? Upon acquisition, all the window shutters zip open to reveal several pissed off Arachnotrons charging up their cannons. To make matters worse a horde of Imps and Hellknights will soon disperse into the room from upstairs and there isn’t enough rockets to deal with everything at this point. Timing to get prepared will be important or alternatively destroy outside interference first. Infighting should help clear enough space to grab hidden ammo in newly revealed compartments. When the Mastermind showed up I got a terrible fright not once expecting such a thing to spawn in minimal space. Case in point the beast barely moves from his warp point. Ended up running to the nearest hiding spot and using his own chaingun against incoming threats before sustaining too much damage himself.
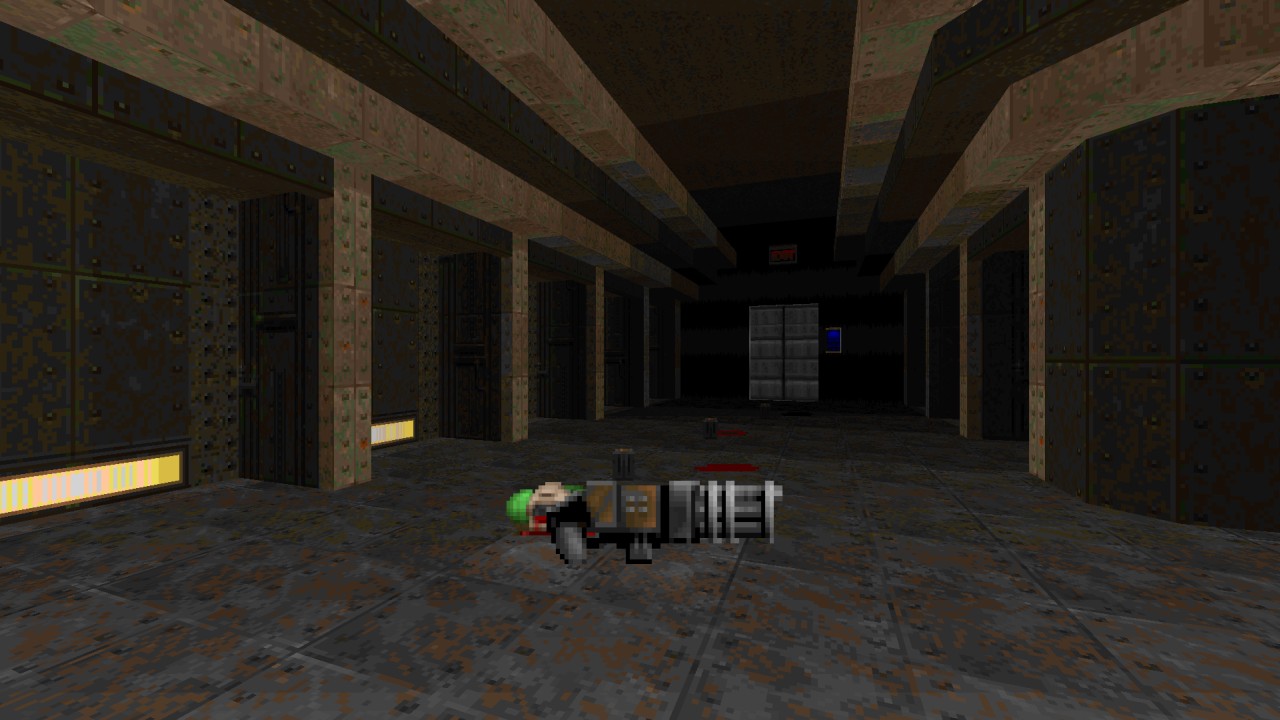
MAP08 – Hide and Seek
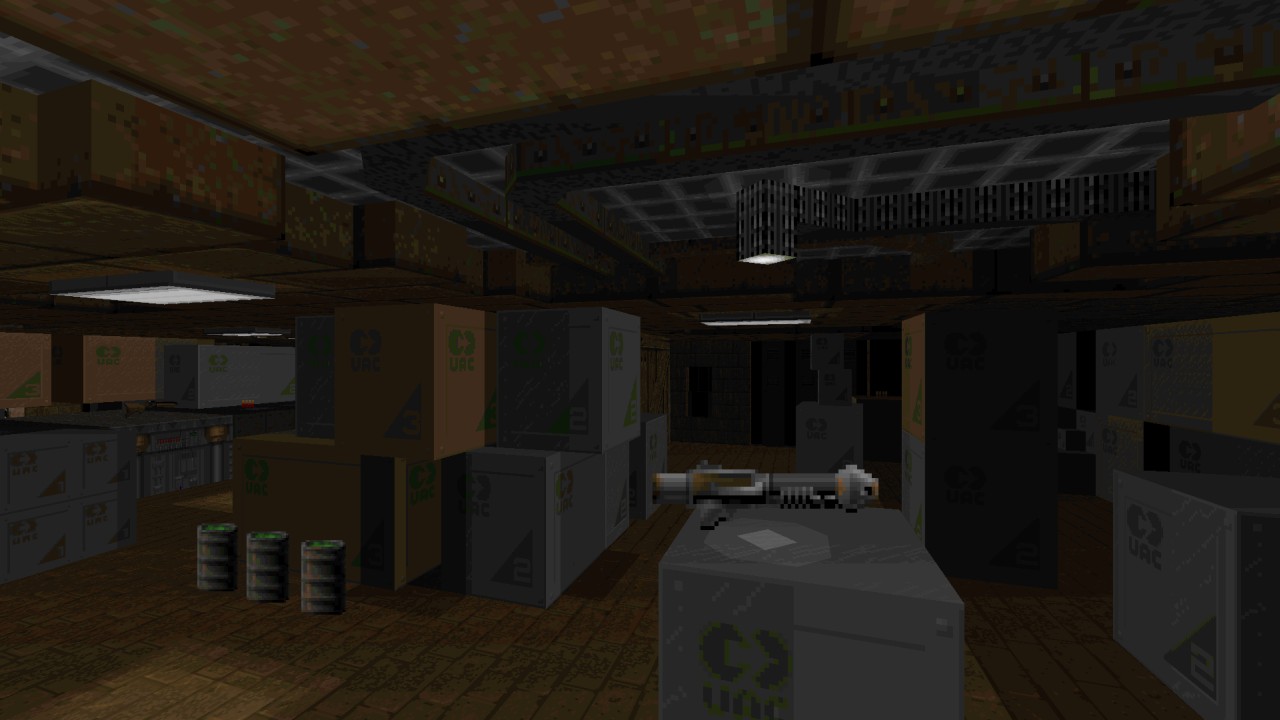
Disguised as a mundane basement filled with large storage crates, I found myself walking around a quiet environment to discover no enemies in sight. For now at least. In reality this basement is potentially horrifying because of tight spaces and many niches. Lo and behold I find a button just out of reach screaming to be shot, knowing that upon doing so I may unleash something terrible. Then a cold shiver trickles down my spine as multiple familiar wails from Archviles cry out nearby. Where are they? The answer to that came quickly after near jumping out of my skin as one suddenly dashes round a corner, only to realise he wasn’t alone creeping up on my flank, then trapping myself in an earlier room to become a slow roasted meal. The next time I came prepared, an SSG held firmly, peeking around crates and creeping forward ever carefully. More Archviles still lurk ahead, some catching me off guard while others ate a few mouthfuls of buckshot. I wasn’t even sure who’s supposed to be hiding or seeking anymore. MAP08 uses a minimal monster count and doesn’t do anything unique in terms of visual theme, but its horror motif spiced up gameplay with effective surprise encounters and kept me engaged as a result.
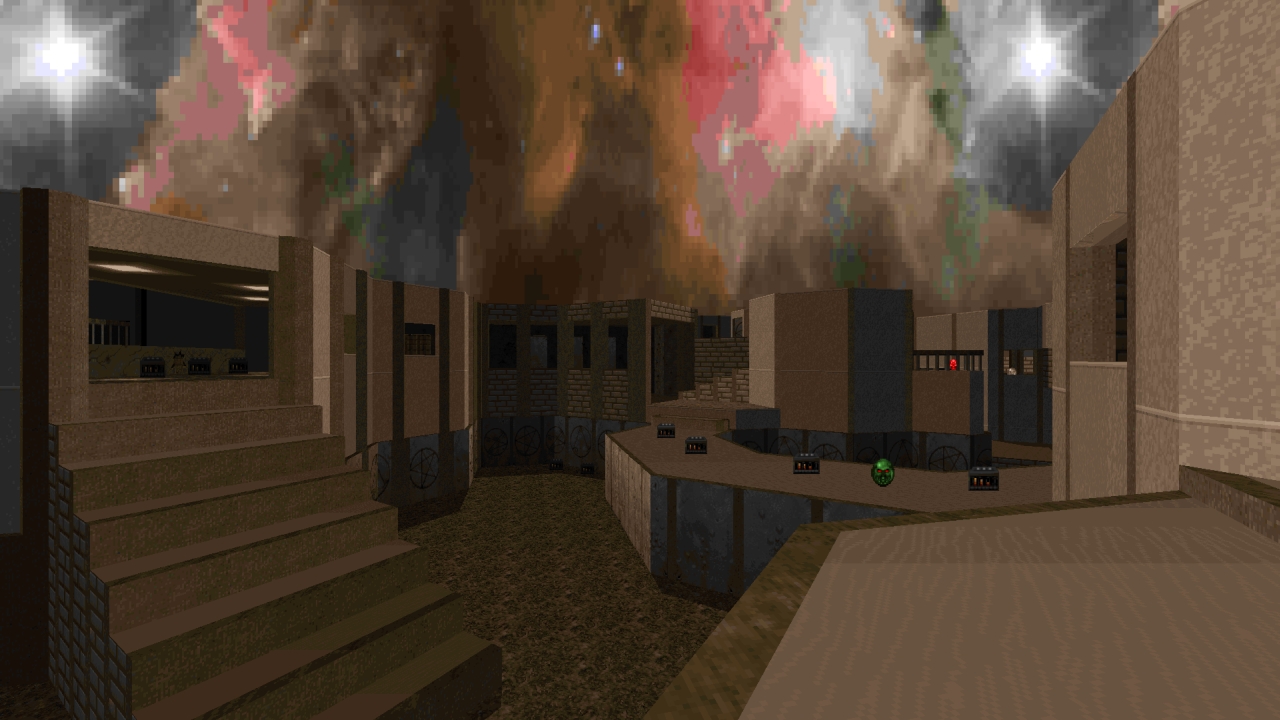
MAP09 – Broken Records
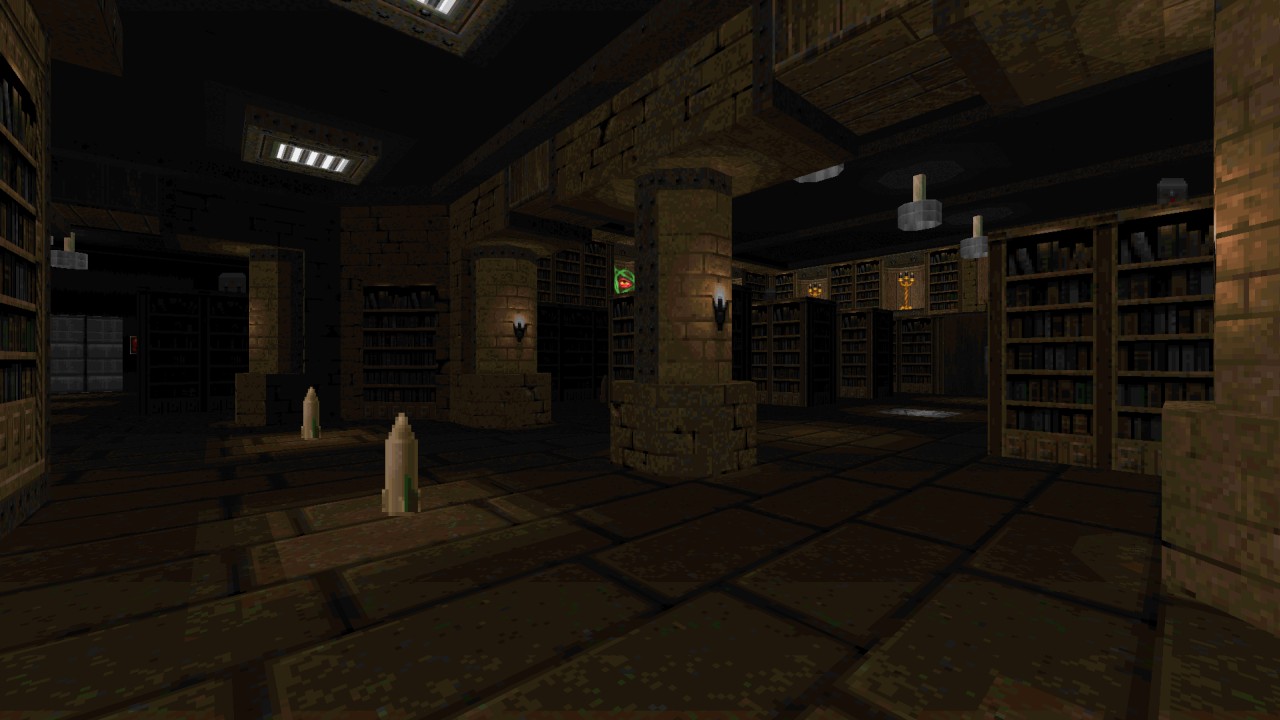
Large archive theme split into four wings, Imps busy reading book bindings and ammo littered between the shelving. That sure provides enough tell tale signs something big will happen as soon as a bullet is shot. I took this opportunity to procure weapons before gunning down an Imp, watching rows of bookshelves soon fill with demon spawn. Positioning was key to lure groups together, fire off several rockets into them and escape through an interconnected layout to another safe spot. I’ve had a fair share of accidents though usually because a Caco thought it was hilarious body blocking my explosives. Navigating away from dangerous is made easy, stairs and lifts leading to higher platforms, paths connecting to other wings and bookshelves to dive across if enemies linger right below an occupied ledge. As much mobility as players have available at their disposal, demons also have opportunities to trigger teleports leading to higher ground.
MAP10 – Trip Switch
Pure discomfort is a perfect definition here, not once did I ever feel secure at any given time. No where in particular is safe nor offers a suitable position to lob rockets into mobs like a maniac without risk. Early moments showcase that your actions will have consequences based on movement or triggering a switch. Ambushes will spring forth at inopportune moments such as grabbing the rocket launcher to be stared down by a dozen Revenants. In some regards you can use an earlier trap to your advantage. Rather than converting both pillars to form a bridge across the other side, only call down the furthest pillar and activating its lift effect. Leaving one pillar tall provides some nifty cover from later assaults assuming it doesn’t accidentally drop down while dodging stray projectiles. The next section however was an incredibly frustrating experience to make a stand, especially after Archviles pop in making any progress on kills pointless until they’ve been dealt with; Attempting to hold position besides the switch triggering these spawns will only allow Cacos to bite your backside, caught between two groups; Rushing back toward an earlier hallway opens up more line of sight for both parties before all flanks are swarmed; and dropping down into the pit attempting to focus entirely on killing Barons to use their hideout, only to realise they won’t die fast enough before everything else catches up. Doesn’t help that Archies make easy work on players from poor cover and platforms lower for monsters granting them passage to areas they wouldn’t otherwise reach. It comes at a surprise to myself that I managed to beat it. Didn’t enjoy this level particularly but thrill seekers might find it here.
MAP11 – Vivsection
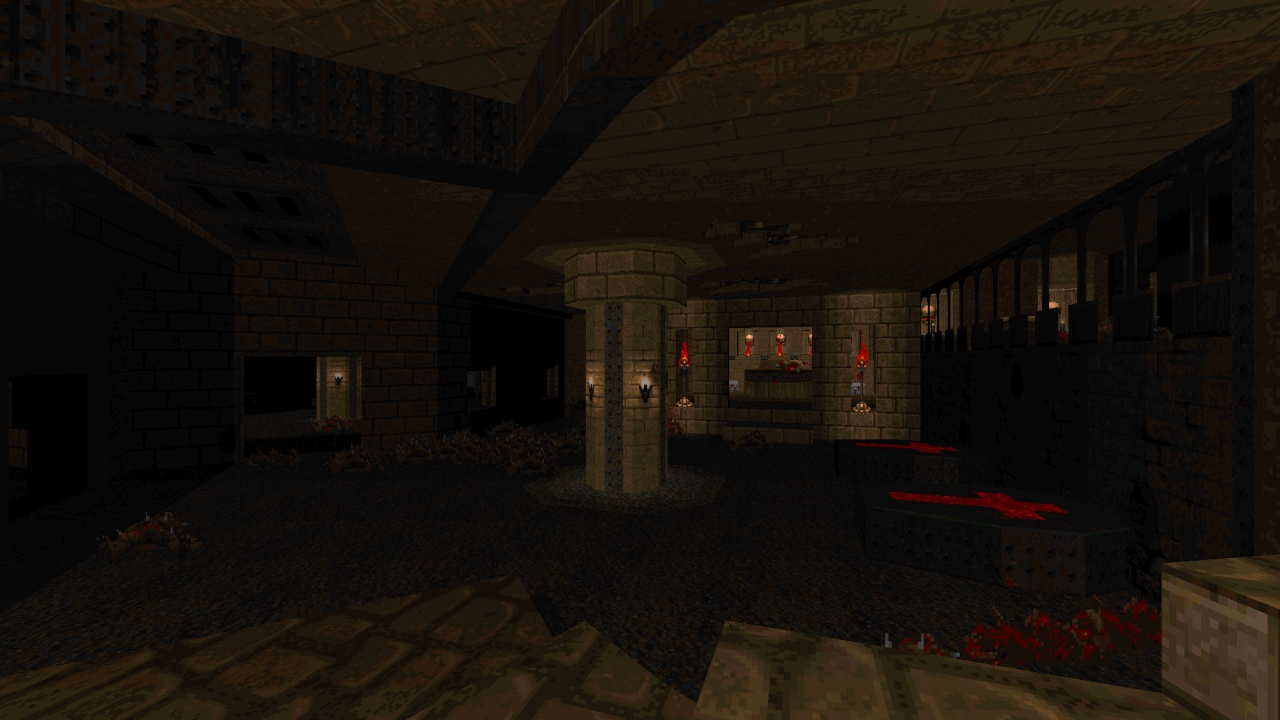
The floor where untold UAC experimentations take place. Design returns to MAP05’s clean, silver texture scheme as an excuse to make these bloodstained machines stand out used for mutilating and torturing demons to find out how they tick or perhaps for their own inhuman amusement as revenge against them doing the same. Feel free to join in, one button away from activating a crusher and hearing them scream in agony, a balanced meditative zone for Doomguy’s efforts up until now. Sometimes they don’t stay dead crawling out of their caskets for another bash at living. Compared to previous floors MAP11 has slower pacing allowing exploration across rooms without worrying about a huge vanguard busting down the doors, gunning down threats one by one and dealing with ambushes as they happen. Not to suggest there aren’t any nail biting situations which could describe the Cyberdemon encounter if not for a well timed Invulnerability Sphere I happened to grab.
MAP12 – Dead End
Played for a fool and dumped into a sewage dump, players are expected to survive against terrible odds with naught in hand and must rush around gathering any supplies or firepower available. For every weapon received alerts additional reinforcements, the twist here is figuring out an optimal order very much dependant on personal choice. I’ve found success going for the SSG then Rocket Launcher to help clear paths leading to other gear. Intentionally left the Plasma Rifle for last; no need to swat a bee hive if it’s not causing me harm! MAP12 feels like a race against time since it doesn’t take long for enemies to close the gap and I probably died a dozen times from overwhelming numbers while working out my best course of action. Limited ammo can be a serious incentive to avoid holding up inside the outer rooms, had many close calls running on low supplies while demons attempted prevent my escape. I eventually resorted to punching out the remaining Cacodemons thanks to a Berserk Pack, having wasted away too many supplies during the struggle to stay alive.
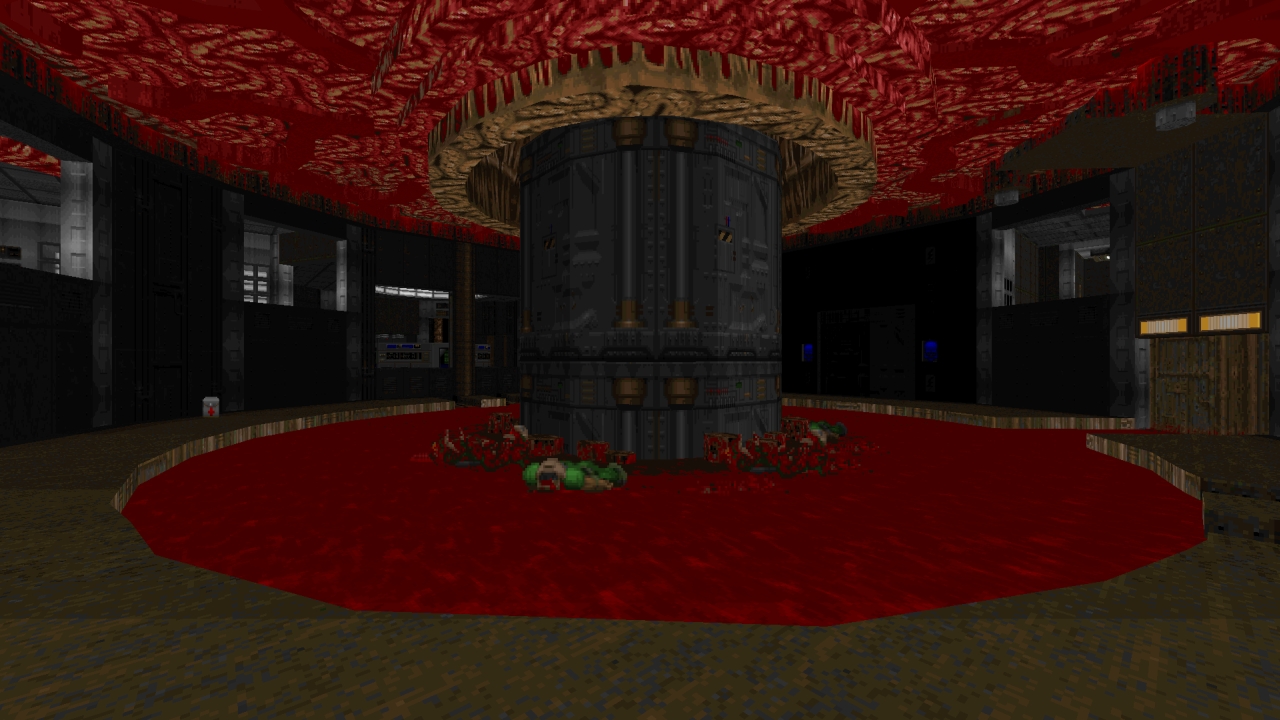
MAP13 – Deep Trouble
A towering, cylindrical staircase descending into a blood soaked chasm paints the scene, a compact environment wherein claustrophobic close quarter fights become common practise here. There’s little leg room yet every big step forward warps in another bunch of hostiles either ahead or at flanks. Pacing is stop-and-go, clearing out each wave before triggering the next until passage is granted to the bottom level. By this point during my original run I had to dial back the difficulty settings because I wasn’t having any fun and wanted to proceed further onward. The second attempt on UV was a success except certain aspects which troubled me beforehand remained a bother. Once the lowest level is accessed the ensuring battle relied heavily on trial and error. Enemies easily gang up on players while their projectiles zip around in every direction known to man. Not only must I keep track of several dozen Pinkies chasing me, an army of Hellknights constantly filter in near our exit point and slowly entering the central arena, all while Mancubi roast your backside and Cacos linger above the battlefield taunting those rockets. While I absolutely don’t mind a challenge by having one major strength weakened (in this case mobility) to rely on different assets. However lacking the space to even breath was taking it too far. Firing rockets is fatal to myself hitting either point blank Pinkies or Cacos who happened to walk into direct fire. That leaves a Plasma Rifle with limited use before running out of juice and a slow firing SSG. To make matters worse, mouldy inserts a little surprise which could have increased my frustration had I not caught on early. Success was only possible by crossing my fingers and making a dash for the elevator before I’m surrounded. Perhaps other players have better luck.
MAP14 – Secrets and Lies
An excavation team unearthed ancient ruins tucked away beneath the UAC headquarters but apparently haven’t had much luck finding an entrance inside. Player progression revolves around solving these problems themselves, locating secret switches and opening up new areas to continue forward. Not exactly a daunting task either since their whereabouts are not obscured as one would expect. Quite the opposite really since clues are plentiful making the next switch easier to notice. After rummaging around in dust looking for secrets, there should in theory be a reward waiting to be claimed right? Well that all depends on perspective. Hell considers another fight to the death a satisfactory prize, as if Doomguy himself is the treasure chest. Ambushes aren’t too bad to start off, skirmishes have a little bite but are bearable. Later once more ruins are uncovered enemies will hit harder attacking from every angle, others strangely enough filtering in one by one from a set of pillars. Holding down a good spot to dish out damage wasn’t easy once I caught sight of the Archviles. My intention changed to focus fire on them except Cacos running wild constantly blocked my path and fodder chipped away at me from behind. Oh, right! There’s also a Mastermind somewhere but he’s just here for the entertainment and barely poses any threat.
MAP15 – Gladiator
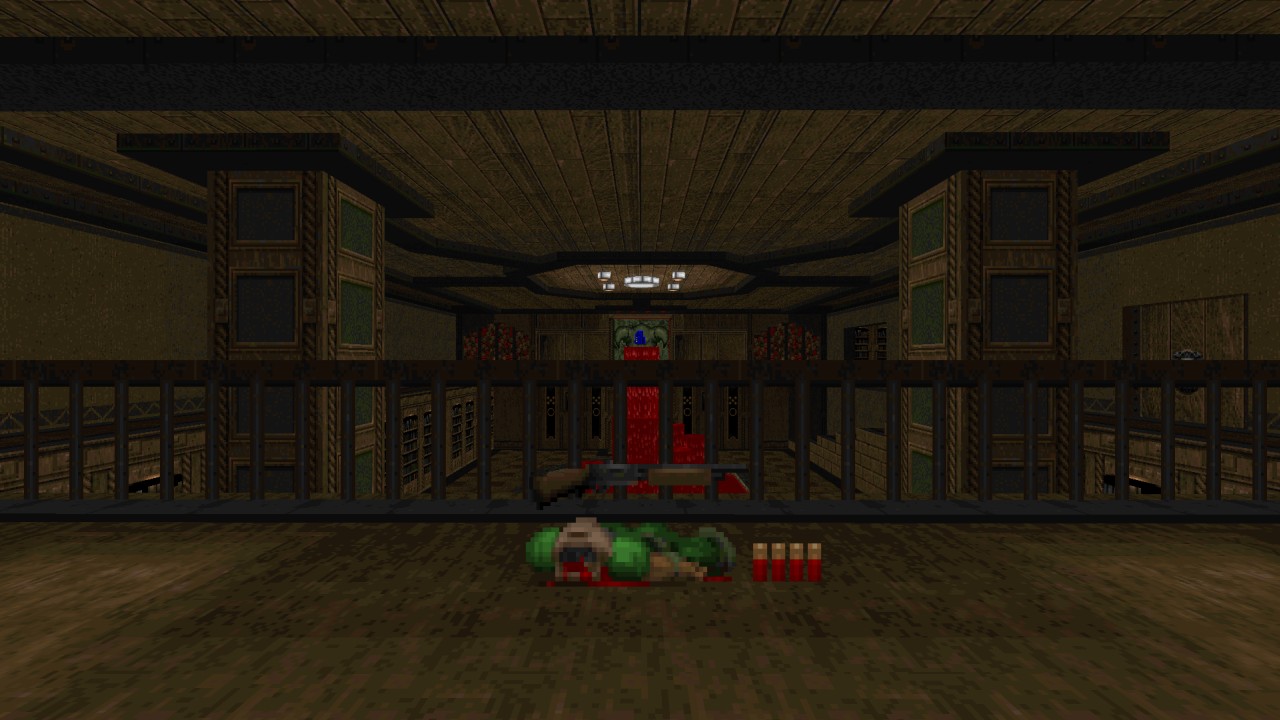
Now this map is cool. Stepping outside the lift we’re greeted to a familiar face beckoning us closer revealing an accommodating audience of demons at their stands ready to enjoy a bloody brawl. Weapons and powerups are situated above switch activated pillars teasing glory while a handful of fallen comrades who came before suggest incoming despair. mouldy spices up what may initially appear to be a rather generic arena setting, creating not only a strong scene but wave based combat based around pacing and item management. I could just grab every weapon right off the bat and have a miserable experience trying to tackle an entire onslaught, all odds against me. Alternatively I could snatch one weapon at a time in any order against compositions depending on my chosen firearm. Beating all four waves yields a fantastic twist; the crowd goes wild jeering at the champion, tossing deadly projectiles in a riot for your death. It’s rather hilarious too since our friendly Cyberdemon wants his time to shine, slowly descending from his throne, only to be showered in attacks not meant for him. I also intentionally left behind a Mastermind to help clean up shop before grabbing that key.
MAP31 – Stair Crazy (Secret)
Doomguy isn’t getting a great phone signal this far down, so he decides to head on up to the rooftop again to receive a better call quality to his mother. Of course those silly demons would rather play dangerously on the stairs. Our only goal is to continue forward while mowing down anything blocking the path, nothing special here, MAP31 is a linear romp where every so often reinforcements are called or triggers open up nearby monster closets to drive players back and get caught in between a pincer attack. The ascent will be a tight squeeze too, corridor widths just wide enough to strafe projectile fire but don’t expect to pull off any fancy footwork. Firing off rockets, plasma and whatever else is at hand without much thought works wonders here since combat is so straightforward. The only real sting I felt was a couple of teleporting Archviles resurrecting a few Barons whom crept up on me. At several points during the climb, there’s an opportunity to peek into previously cleared floors to remember all those great moments you’ve hand up until now.
MAP32 – Roof Rage (Secret)

Back on the rooftop there’s evidence of destruction since the last time we set foot here, almost hinting at MAP05’s possible future if things continue the way they are. A lone Mastermind baits players into attacking, weapons and powerups littering sections of roof. First shot warns the others and in comes a parading swarm of Imps and Zombiemen preventing good manoeuvrability to hinder effective combat much like they did in MAP01. That spider was my first priority target and thought with him gone the level should become hassle free. Wrong again says the sniping Arachnotrons and Cyberdemon from the rooftops yonder. Donning the chaingun and sucking my thumb inside a small cubbyhole I let loose bullets, clearing out all fodder who happened to creep into my line of sight. The situation heats up once I’m able to hope between rooftops using teleporters, skipping around to avoid missiles and glowing balls of death, encouraging enemies to attack each other while I frolic without care in the world. Yes I had fun doing this. Seeing that cloud of Cacodemons drift closer and roasting them with a dozen BFG shots was satisfying as they plummet to the streets below.
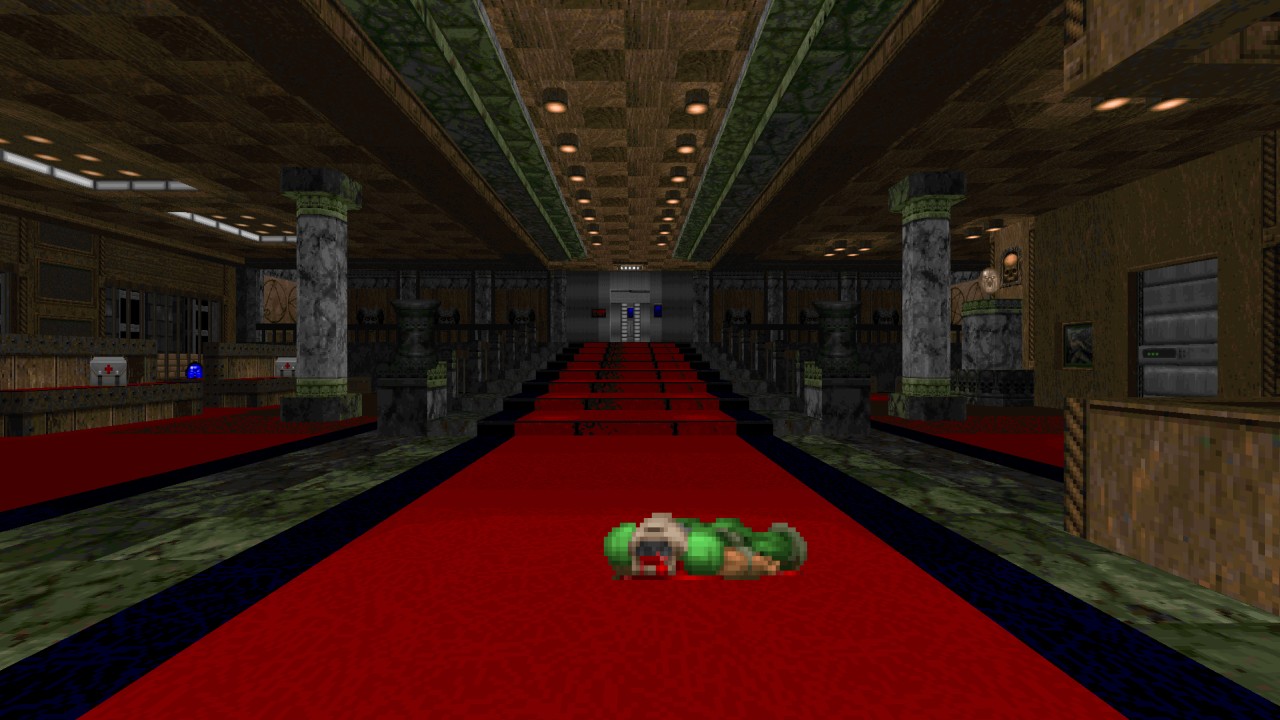
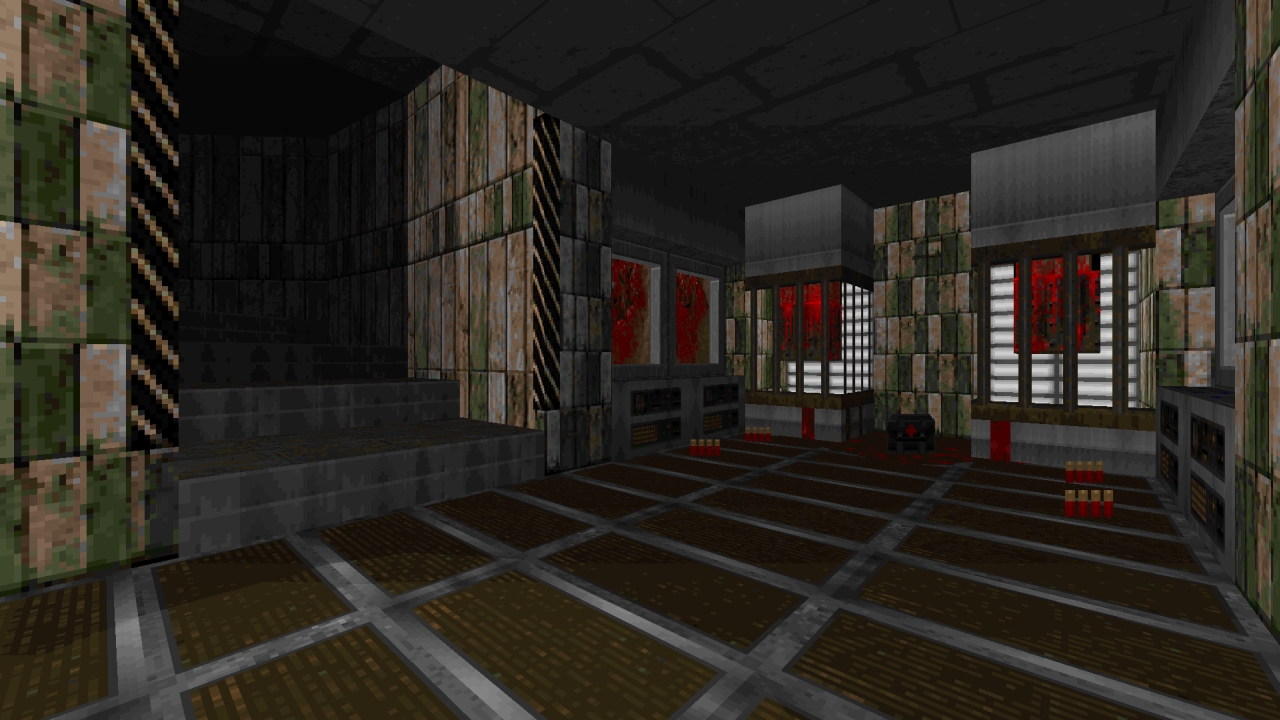
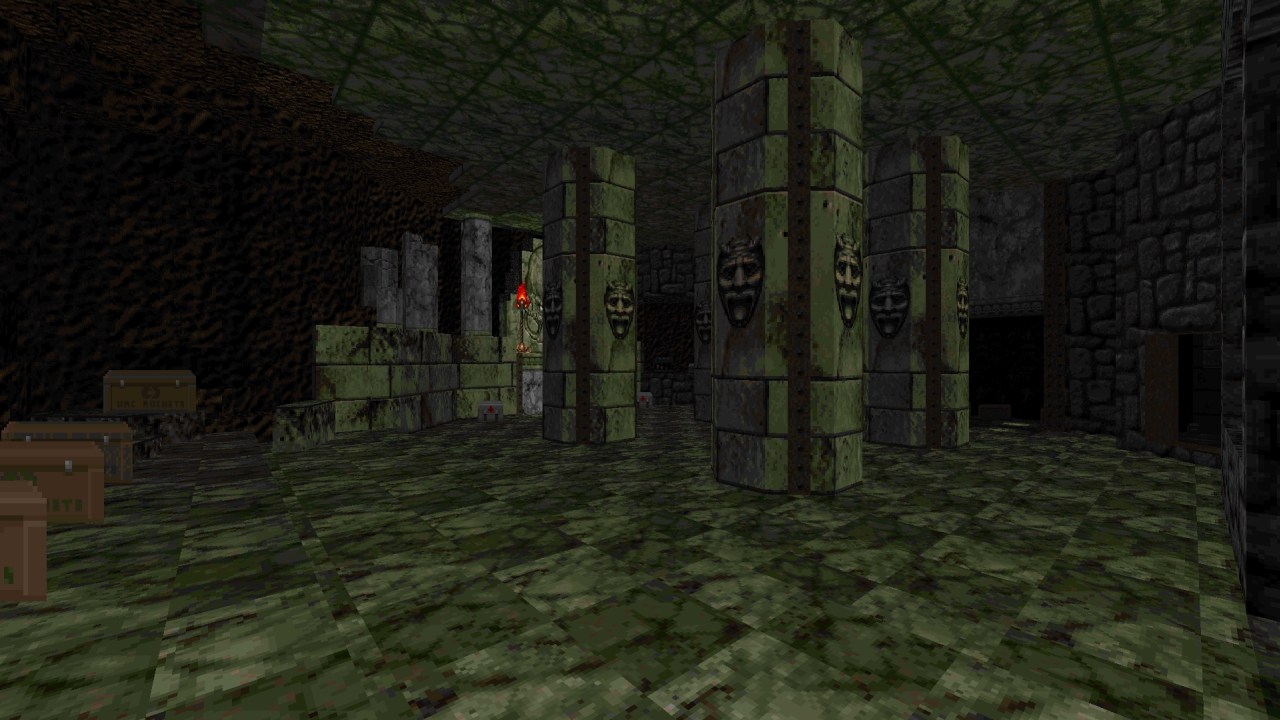
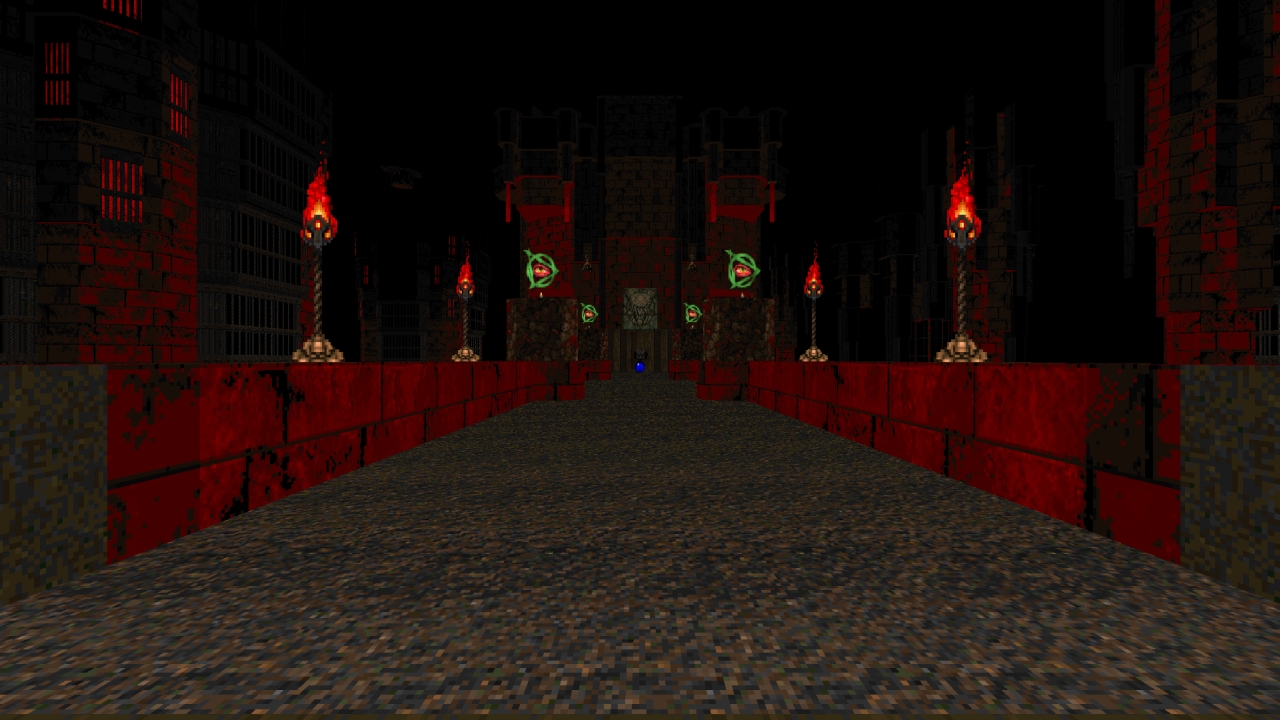
MAP16 – Black Mass
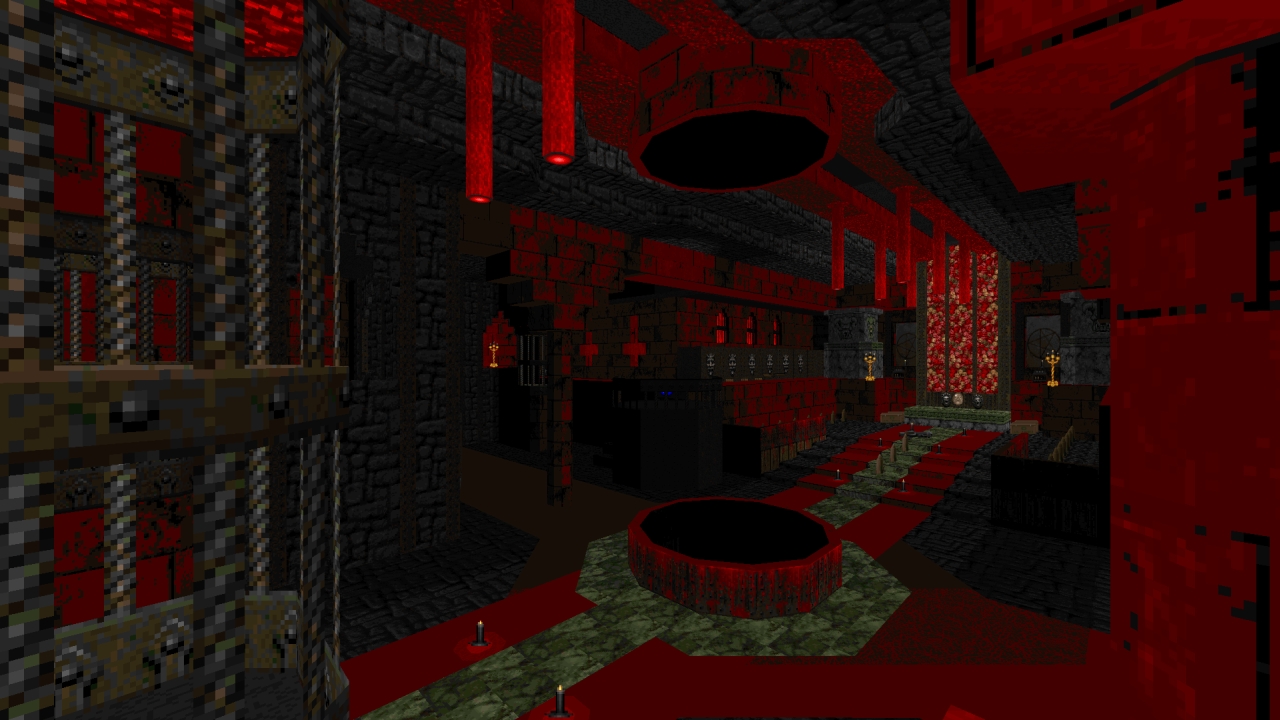
Now we’re entering Hellish realms and first on offer is a decently sized, red marble satanic church complete with an altar, sermon pedestal, wooden confession booths and possibly a sacrificial well. Players are left to discover a very methodically paced level, choosing their own optimal routes and considering how to deal with incoming threats. Should I rush past to grab the rocket launcher or take a cheeky detour to one of upper ledges for a plasma rifle? Depending on how players start off will determine overall difficulty, because as we’ve been taught many times before our actions will have consequences which tends to increase monster interactions. Weapons aren’t so easily grabbed without some form of resistance, yet powerups are seemingly fair game. Loving the visuals too, macabre and moody. Great use of red and metal combinations, tons of ceiling variation and that ominous pit with an opening above provoking ideas. I was also glad to see MAP16 opening up to allow better footing and not feel so restrictive in scale either.
MAP17 – Rest in Pieces
Utilising the whole layout combat here is fast, furious and not surprising anyone by this point, incredibly ferocious. Your first visit to these graves is met by a mass of mourning Imps not happy at your presence. And oh boy there’s tons of them. Others types will too rise from their tombs and join the disarray, from Sergeants to Revenants. During intense fights I found myself retreating quite often to catch my bearings and discovered spawn points have been dotted around to create several venues of attack, hammering down the pressure even during these times of relief. I’ve lost count the deaths caused by foes utilising these by my own rockets. The whole map is connected at various points that open up when crossing certain boundaries, giving both sides many opportunities to attack from. Closer toward the end I lost patience against a few Archviles who mocked me by resurrecting foes that stood between us. Having died a dozen times trying to play smart I opted for careless actions until every single one was slaughtered; that central chamber can be near impenetrable because of them.
MAP18 – Buried Alive

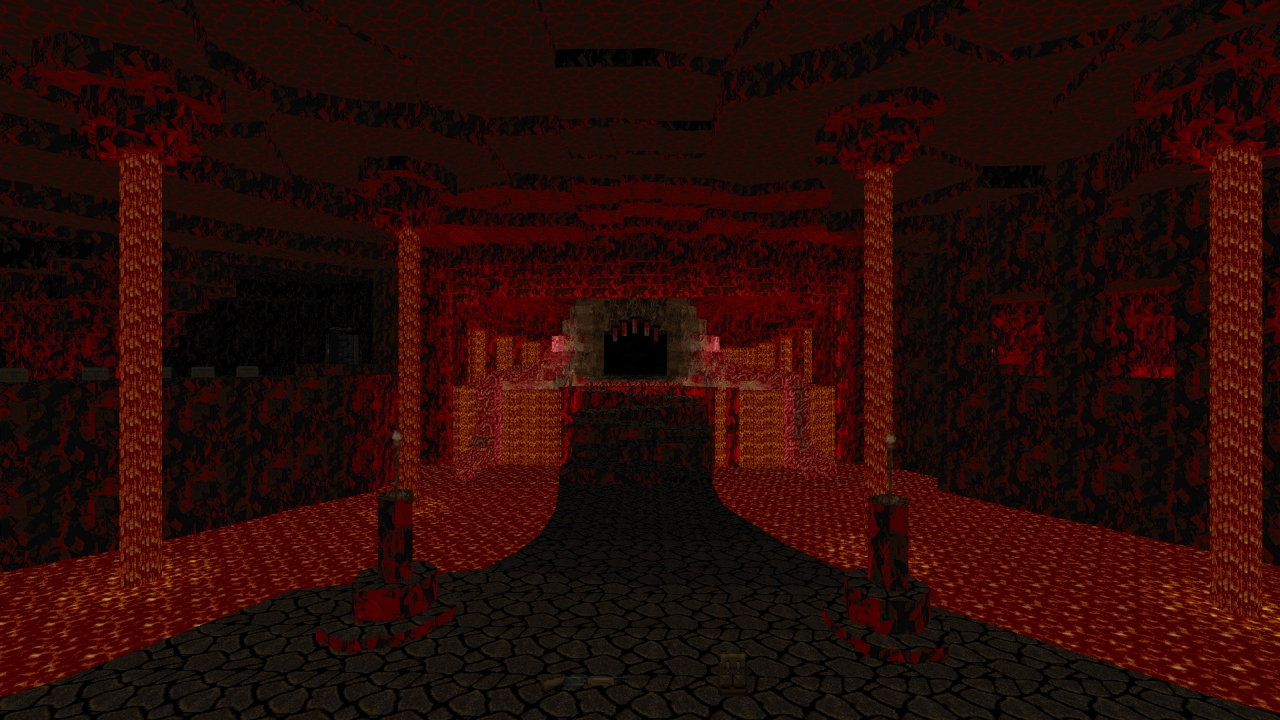
Oh dear. That unsettling silence as your tear away dirt blocking the elevator doors to traverse through a dark cavern and then sighting a forgotten UFO casually buried deep beneath the UAC Headquarters, procuring weapons and supplies along the way. Eventually a plunger beside several explosives is found. My conscious tells me not to touch it, understanding full well what I’m about to unearth won’t be a pretty experience. I have no choice in this matter. Once the rocks have finished tumbling, amidst its debris and dust await a mixture of maybe fifty Hellknights and Barons staring angrily back at me. That’s when other terrors begin filling a once empty cave. I found the central area safest so long as it was protected from Cacos sneaking around corners. Problem is there isn’t enough ammo to deal with a continued onslaught unless players are daring enough to head out of comfort. Infighting is invaluable here, a perfect opportunity once hearing several stomping hooves from Cyberdemons, baiting out those rockets to save wasting supplies. During key points in progression cave sections will further collapse providing less cover, creating additional entry points for enemies or to be a cruel bastard because of my chosen hideout. Eventually my ammo dropped to critical levels having to make several futile dashes for a BFG if I want to survive any longer. It wasn’t until catching sight of an Invulnerability sphere that assured me a complete victory.
MAP19 – 200 Mega Hurts
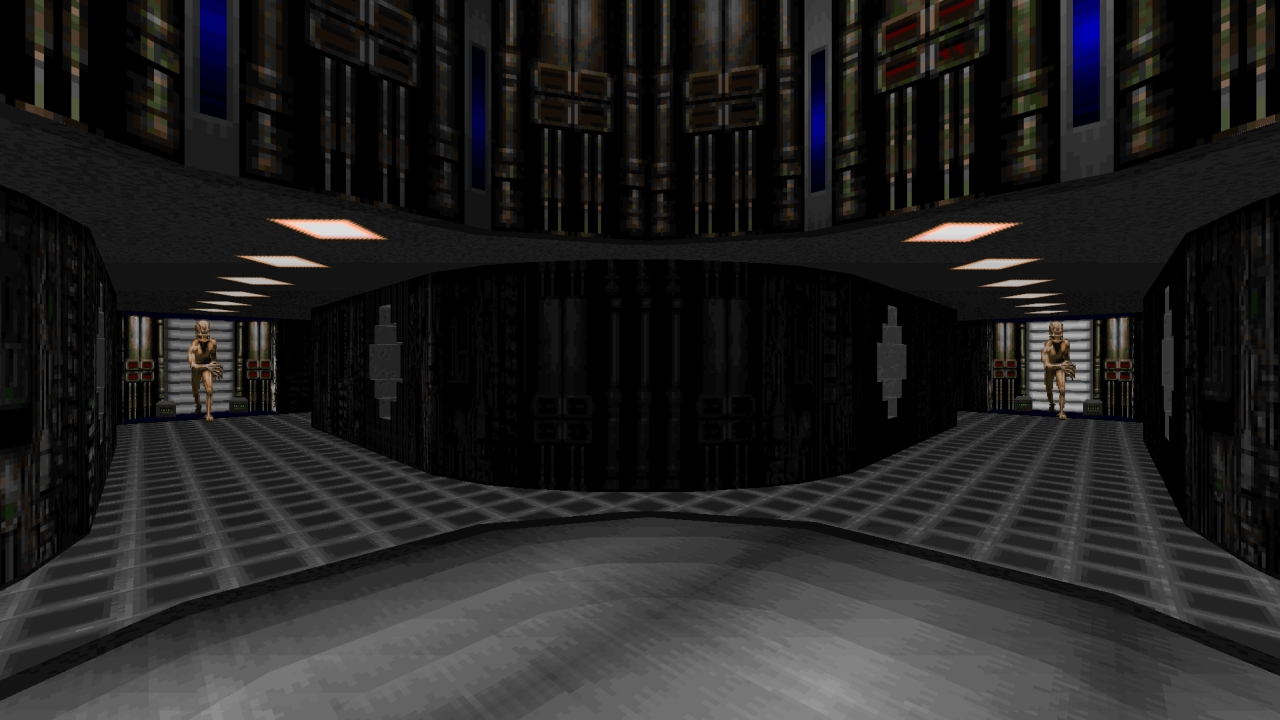
Depending not only on individual tastes but also how well the scenario goes for players, this is another gimmick level that could either be an incredibly frustrating experience or barrels of fun. The initial segment within an alien UFO works as a trial of sorts, an eerie circular interior surrounded by at least a dozen Archies currently in stasis who appear like classic greys when placed in this environment. The BFG found here makes up one portion of this gimmick as the only means of firepower. Every shot must then count and that alone can be troublesome in this area once our friends wake up, darting left and right constantly avoiding a direct hit. The second portion beyond a portal contains a strange playground consisting of stairways, rooms and ledges twisting amongst each other. Occupying those spaces is around a hundred Archviles. Overall goal here is to carefully manage BFG ammo and taking full advantage of what few Invulnerability Spheres exist to keep progressing forward and locate the red key. One annoyance is being juggled around causing shots to miss or wasting precious time. If caught in a circumstance where all ammo is depleted with no powerups in sight, getting past the crowds might be nigh impossible forcing a level restart. Assuming its possible to squeeze past, their attacks will make short work of health when all going off at once. The Pain Elemental segment though isn’t nearly as troublesome to get through.
MAP20 – The Mouth of Madness
A sort of epic interlude into the next stretch of levels depicting more devilish or fleshy themes going forward and honestly not too demanding on players skillset either considering the high chance that infighting will occur amongst… well, everything that exists here. The chasm itself is spacious with a large surplus of gear at your disposal. Combat can pretty much be left to the Cyberdemons or anything with a height advantage such as Mancubi while I focused at clearing away the Cacos. Two teleporters above ground offer a great escape route when things get too hot, warping elsewhere to catch some breathing space before focusing on the next targets. The only real concern is falling in lava, more of a nuisance than an actual threat. Easy to escape from but potentially useful if a clever secret providing biosuits is discovered. I did enjoy the level introduction too which gives a good view of that gaping mouth before it pukes out Imp curry.
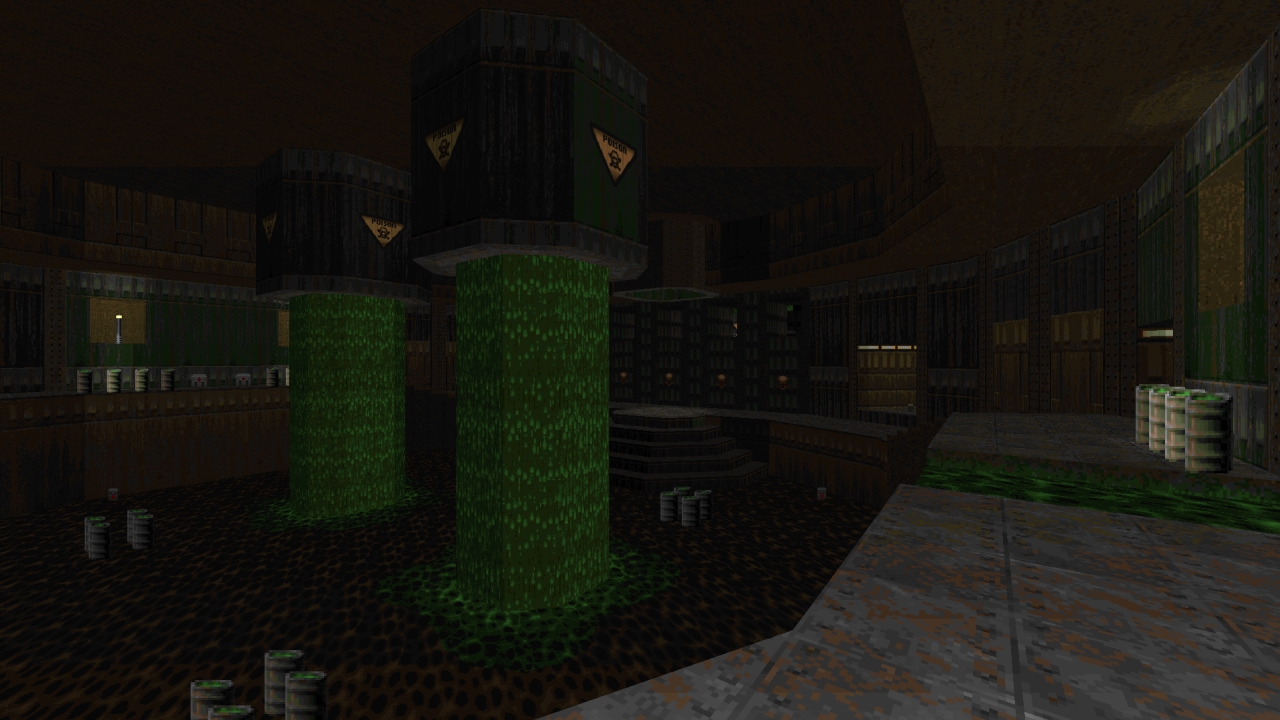
MAP21 – Indigestion

Takes place inside the creature’s digestive system we jumped into from MAP20, surrounded by walls constructed from flesh, bone and other disgusting innards. Only defensive tools here is your trusty pistol, a few bullets and your well toned bare knuckles. Landing directly on a Berserk pack as the level starts is a vital clue about your main form of combat which might be frightening venture considering what crazy encounters it took just to get here. Leave those worries aside since fist fighting works perfectly fine here. The layout alone offers a lot of interconnectivity to retreat away from danger, many infighting possibilities and enough space to dart in for a cheeky love tap. Other advantages are crushers being activated along the way, great to whittle down groups. Revenants might also be a scary thought but they’re honestly not too much of a problem with all this cover provided and they go down in few berserk punches. Only tough spot is around the Red key on UV against those Barons in tight, close quarters. Not a big problem on lower difficulties being replaced with Hellknights. Gameplay wise this was a refreshing spin, not only a break from crazier affairs but I enjoyed the idea behind a level dedicated entirely around using a Berserk pack and would love to try out more.
MAP22 – Constipation Station
Pretty much your standard mouldy affair going on here, continuously pressuring players to move and not holding any punches the whole way through. Back to a smaller scale set piece, centred around a station possibly here to filter out whatever the upper portion digests. Lots of close quarter fights, several ambushes along side other surprises to catch players off guard, but having made it this far this level feels rather par for the course. Technology mixed together with fleshy substances is a disgusting combination and blood oozing out of consoles with meaty screens. From one portion we even get sights into a chasm we’ll soon be entering in later levels, reminding us just how far away from civilisation we’ve travelled and this station should not be considered normality. I honestly don’t have much else to say for MAP22 other than its a standard romp as far as GD goes. Besides an interesting theme combination applied well through visual choices, it doesn’t do anything crazy from a gameplay front. Simply an all round solid level that kept me alert at all times.
MAP23 – Demonology

Seven yellow skull keys are scattered around an old, eerie mansion with a unique non-linear twist. Players must discover all their hiding spots, retrieve them and activate whatever crazy ritual they’ve currently got set up in the main lounge. Each skull collection is displayed gloriously atop one pillar and can be found in any order desired creating a very diverse pace. Weapons aren’t entirely limited to specific areas either, for example a rocket launcher can be snatched in either the dining hall or experimentation room depending on route chosen. MAP23 is quite interconnected too even in unexpected ways, potentially clearing up dangerous encounters along the way before they become an actual threat later on. In fact traps litter these halls at varying danger levels, whether that includes Archviles playing hide and seek behind a wall or an ambushing horde knocking at the doors of a small cell you just happened to be exploring. Acquisition of some keys can be obscure though such as one found in the bedroom, which I decided to ignore until I’ve explored every other inch first. Another favourite level of mine.
MAP24 – Bridge of Blood
Two tall marble towers, one long bridge connection between them and a red skull key located at the opposite end with great armies blocking our path. One of the few levels which looks like your typical slaughtermap affair from initial sights alone, revealing hefty numbers stacked in a single room and more to follow. Barrels line parallel to them tempting players to try their luck. Battle heats up beyond the bridge when Revenants charge forward together beside bulkier friends to protect their bastion. Imps take advantage of this to cause unnecessary panic from behind while the main thread marches on. Truthfully I’d say you could probably tape down that fire button for most fights here. Lobbing rockets down a straight path across the main bridge or through windows works well enough, there’s little tactics to employ besides finding better ground to work from. My alarm bells only rang from a triple Cyberdemon threat lumbering toward the throne room I only just cleared out. That final ambush however back at the original tower was a nasty surprise forcing me to a halt and catching rockets I’d been trying to avoid in my backside.
MAP25 – Forbidden Fruit
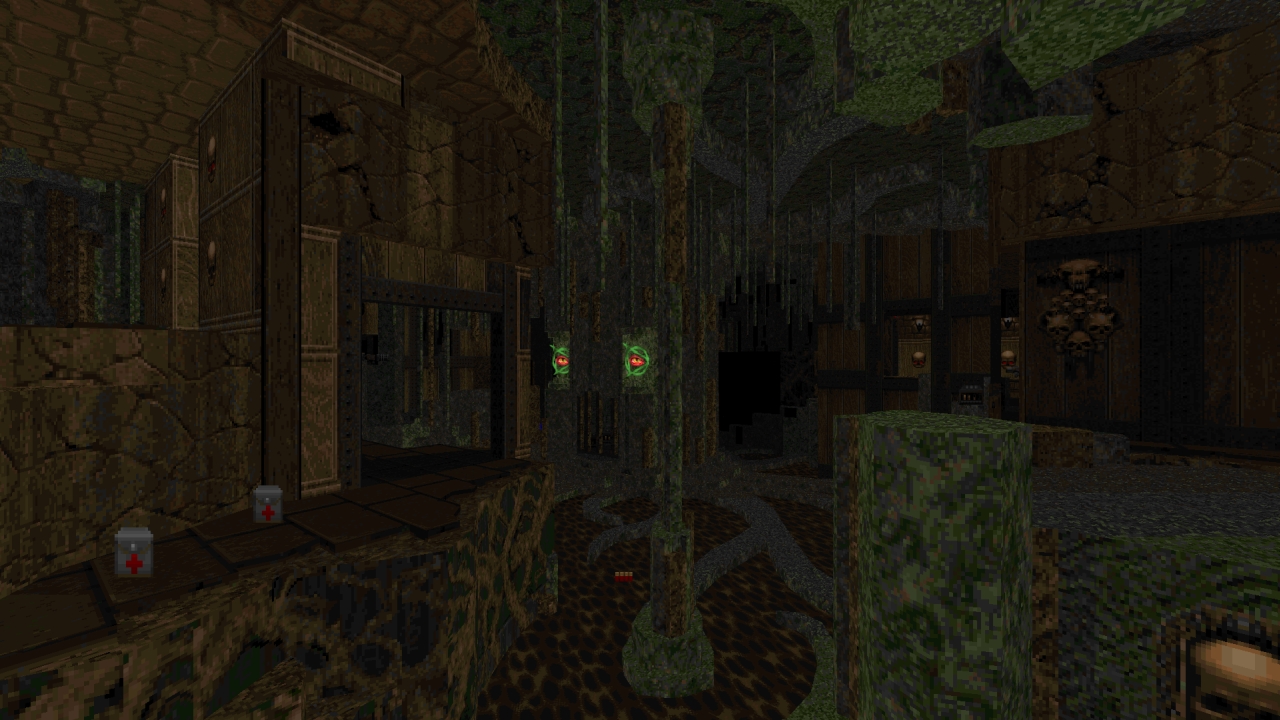
From a thematic standpoint this ends up as another favourite of mine due to the execution through visuals and to some extent its gameplay. What originally appeared to be a wooden interior is slowly being claimed by an bizarre looking tree, its roots twisting across murky water into other sections and plant growth changing the very layout creating nooks and crannies that wouldn’t typically exist. Dense sector details emphasis the difference between this organic abomination compared to the man-made interior. Enemies here enjoy taking advantage of higher ledges to rain down hell and Cacos are quite a pain to deal with. Incredibly easy for me to get snagged on details and difficult to see them hovering above despite the level not being too large in scale. It’s also dangerous to fire rockets from high points because of the thin hanging vines made from sectors. MAP25 opts for a unique method to attain the blue key currently locked inside the central tree. Many fruits hang from branches and other niches that must be destroyed, letting out a screech when shot, in order to force open the creature’s mouth. Again another nice change of pace up until now rewarding exploration similar to MAP23 except from a different angle. I have to give a bonus heads up for allowing us to see the previous level from below.
MAP26 – Insanity

After stepping outside the lift I was expecting another hellish scenery but instead was met with something far more chilling. Rows and rows of similar looking elevator shafts all lined up within one large space, barely lit with only a few minor threats to worry about. Something is clearly amiss right here. Blood splatters reveals a trail toward mutilated corpses, weapons and a switch. What awaits after activating said device becomes a fantastic transformation sequence entering a whole different environment altogether. And of course its open and hostile one. Getting a foothold around here takes some legwork or possibly a bit of luck. Choosing a switch providing access to the outer elevator shafts helps a great deal considering the goodies found inside and a great place to keep away from the dangers below. Otherwise locating this from below would be in players’ best interest even after grabbing the key. Little frustrating at times due to the sheer number of projectiles flung your way due to its spaciousness and Cacos can also become a nightmare if other brutes like Revenants haven’t yet been dealt with. Concludes with a damn fine, creeptastic outro too. Love this level from a technical standpoint.
MAP27 – Hard Cover
Perfect titled level because finding any good cover is an incredible challenge in itself let alone discovering a good place to start killing stuff quickly just to create some personal space without losing too much health. There are too few places that will provide some form of break from the action assuming enemies don’t find their way to that position. Solid walls are sparse, grated walls taking their place along many ledges and vertical hotspots. Enemies have long sight lines at players to attack them from all possible angles, therefore reducing the effectiveness of mobility. Vision can somewhat be obscured by the texture choice here hiding the odd foe if they’re far enough behind them. All hitscanners play dirty here since any hitpoints lost will make things more troublesome while projectile based ones have trouble from vertical angles which can be abused. mouldy truly hammers down the pressure without any remorse ensuring little comfort can be had here and when progress is finally being made with enemies falling by the dozen, MAP27 starts to feel lonely by the end.
MAP28 – Necropolis

After a long hard fought descent, what lies ahead on this final floor is the demons last stand throwing absolutely everything at you, counting beyond a thousand opponents during the course of battle. Indeed MAP28 counts as a slaughtermap in terms of gameplay compared to floors that came before it. But much unlike other floors its spacious with tons of cover and hiding spots. The high enemy numbers may appear overwhelming, especially as more filter in over time, but definitely beatable on UV whether players choose to stay on the move or take refugee often. There many opportunities to lure them all in one direction only to head off the opposite side to catch a breather, then pop off several cells or rockets for crowd control. Archviles were my only concern dragging out these fights usually located at the centre of groups making it difficult to specifically target them. Cyberdemons on the other hand behave as static turrets with height advantage. Two Invulnerability Spheres and Megaspheres located near the middle make short work of most onslaughts if used wisely, preferably saving at least one per major wave and resorting to invulnerability if the situations grows too dangerous. Soulspheres and Blue Armour are also scatted about, while limited provide some nice early benefits for players and other supplies are plentiful. BFG and Rocket spam is a viable tactic leaving behind a mountain of corpses by the end before you know it.
MAP29 – Demolition
We might have reached the lowest depths of this invasion dealing a huge blow to their demon forces, but it’s note quite over yet. The UAC Headquarters cannot be saved any further and is too dangerous to leave standing, so a line of explosives surround its exterior waiting for players to activate its detonation device. Amongst the debris awaits one last encounter with a Spider Mastermind situated on top the ruins protected by a small squad of Revenants. MAP29 isn’t quite an epic brawl compared to MAP28, instead making up for it by doing the opposite. Where mobility was once an advantage, here it works against players being out in the open for too long. Several waves of fodder, Cacodemons and even a couple of Archviles spawn into the battlefield designed to coax players out from their hiding spots. After enough damage has been sustained dealt to Brain-On-Legs, he’ll transform into a tougher version wielding Napalm Blasters and Homing Rocket Launchers. Also makes a satisfactory scream when shot in this state.
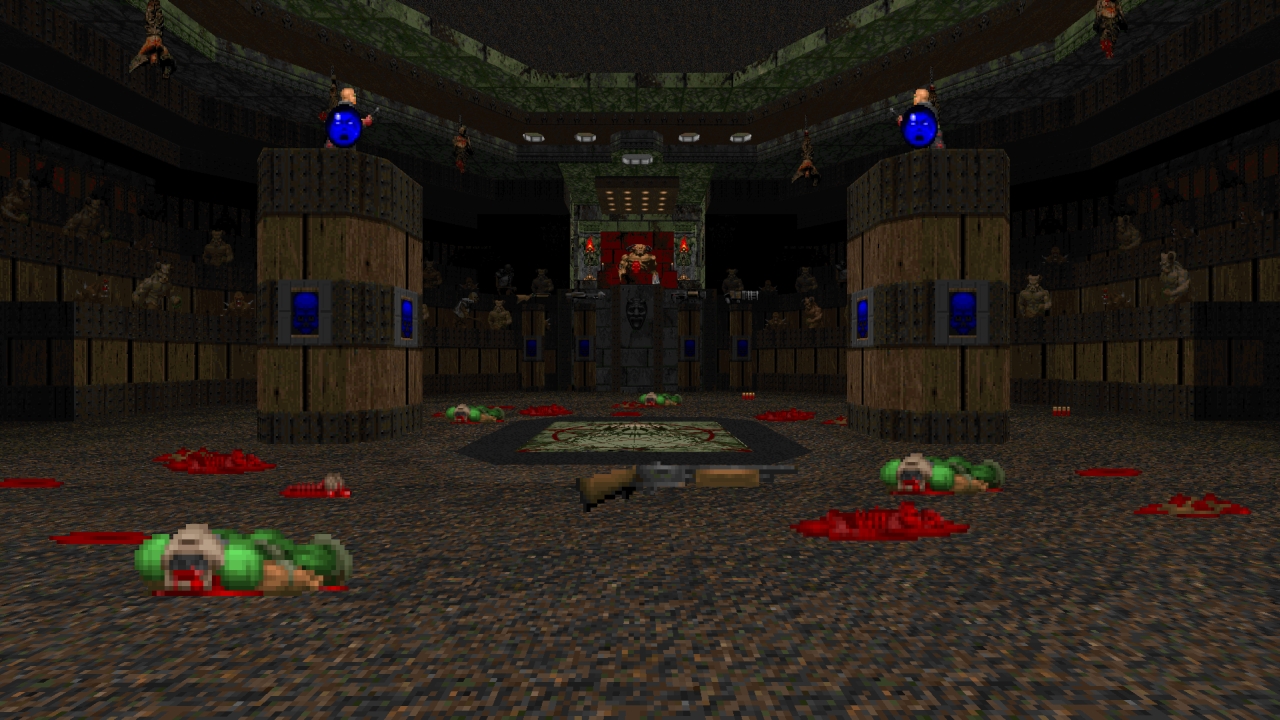
MAP30 – Game Over
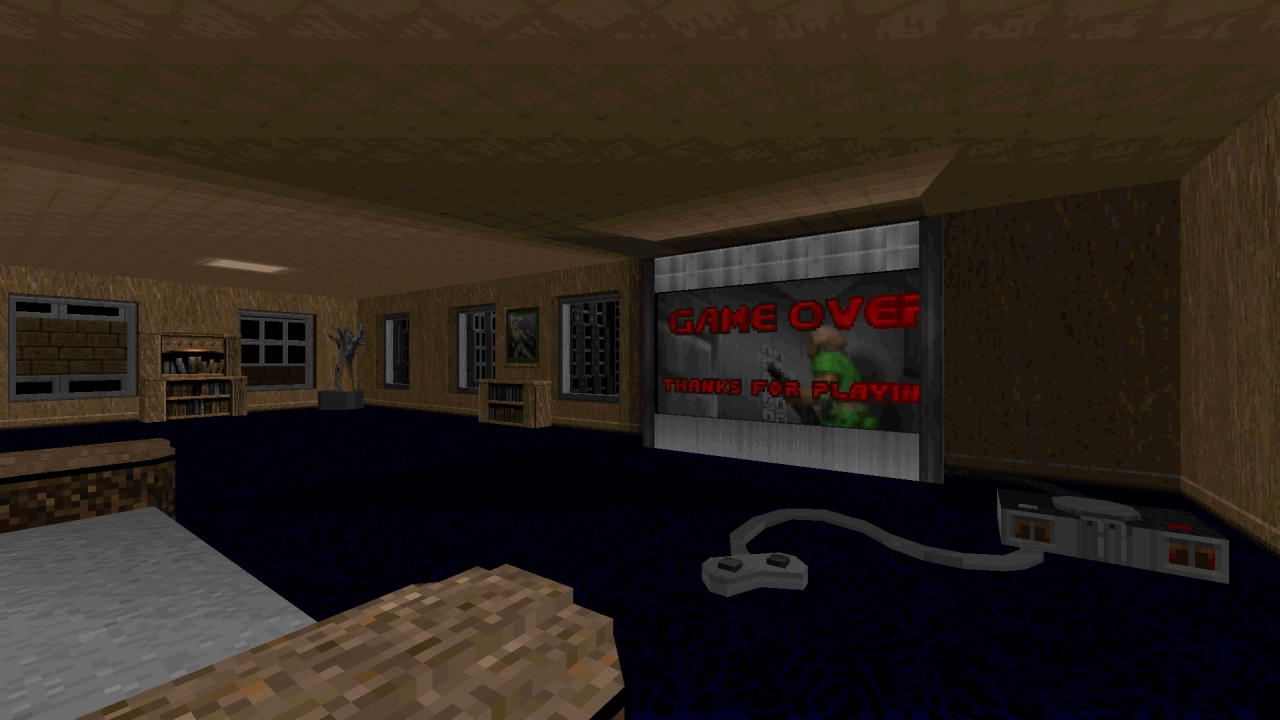
A short, extra conclusion seemingly aimed at poking some extra humour and perhaps to suggest this adventure isn’t quite over with us ending in a familiar elevator that we’ve been conditioned to love. Practically plays out as an Icon of Sin finale except on a much smaller scale which can get out of hand fast, especially in regards to how tight the apartment is. Health is also very lacking and doors we need to escape through won’t open up immediately even after grabbing the red key. Once that hallway becomes too cluttered it may become difficult to through while other players might have better luck. Both my attempts in each playthrough had me surrounded from all angles, telefragged, blowing myself up or getting stuck in between two demons when one happens to spawn in front of me. Not quite a great way to finish off the megawad personally but easily set aside for every other great level included in GOING DOWN.